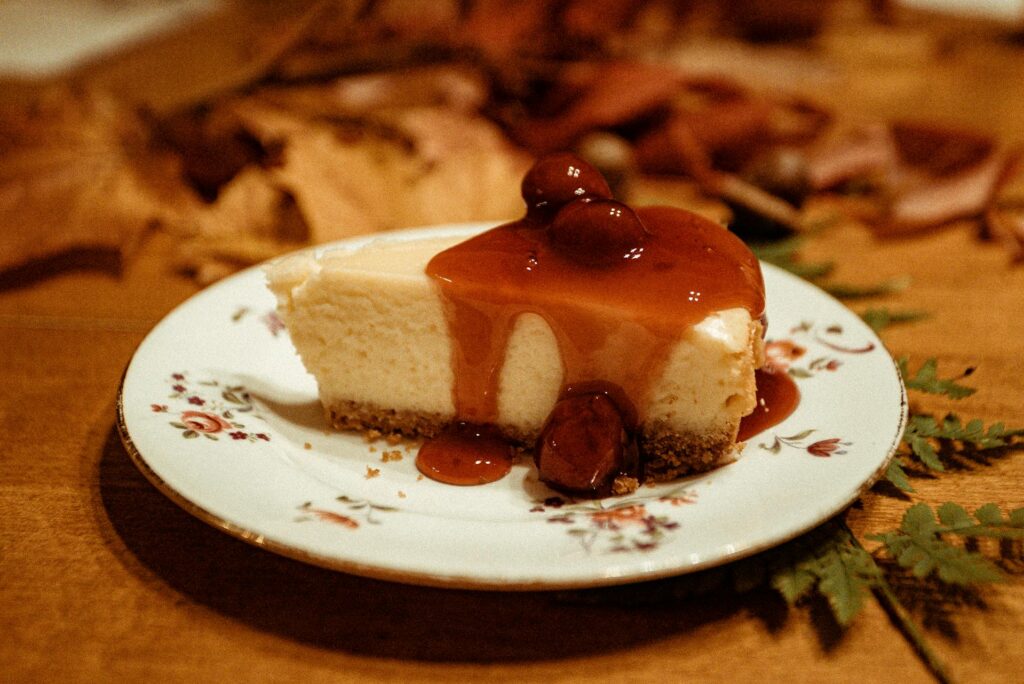
Craving a rich, creamy cheesecake without turning on the oven? This no-bake vegan cheesecake is smooth, indulgent, and surprisingly simple to make.
It delivers all the classic cheesecake flavor while staying completely dairy-free.
The filling blends into a silky texture, and the crust comes together in minutes. No complicated steps. Just mix, chill, and enjoy.
It’s a perfect dessert for warm days, family gatherings, or anytime you need a quick treat.
Best of all, it requires no oven and very little effort, making it an easy win for any home cook.
Why You’ll Love This No-Bake Vegan Cheesecake
No Baking Required
This cheesecake comes together without turning on the oven. That means no worrying about cracks, water baths, or overbaking. You simply prepare the crust, blend the filling, and let the fridge do the rest.
It’s a relaxed process that fits easily into any kitchen routine. Even beginner cooks can make it with confidence.
Rich, Creamy Texture Without Dairy
A great cheesecake should be smooth, thick, and satisfying. This recipe delivers exactly that. The blended cashews and coconut cream create a silky filling that slices beautifully once chilled.
The flavor is rich and balanced. A touch of lemon adds brightness, while vanilla rounds everything out with a classic cheesecake taste.
Made with Simple Plant-Based Ingredients
You don’t need a long list of ingredients to make this dessert work. Most of the items are simple pantry staples or easy to find at any grocery store.
Cashews create the creamy base. Coconut cream adds richness. Maple syrup brings gentle sweetness, while lemon and vanilla build flavor.
Together, they blend into a filling that tastes surprisingly close to traditional cheesecake.
Easy to Customize with Toppings
One of the best things about this cheesecake is how easy it is to change the flavor. The base recipe is simple, which makes it perfect for adding your favorite toppings.
Fresh berries add brightness and color. A quick berry sauce makes it feel extra special.
Chocolate drizzle, crushed nuts, or even a spoonful of fruit jam can turn each slice into something new.
Perfect Make-Ahead Dessert
This cheesecake actually gets better as it chills. Preparing it ahead of time gives the filling time to firm up and the flavors to settle together.
You can make it the night before a gathering and keep it in the fridge until serving. When it’s time for dessert, simply add your toppings, slice, and enjoy.
Ingredients You’ll Need
For the Crust
- 1 ½ cups (150 g) graham cracker crumbs or crushed vegan digestive biscuits
- 5 tablespoons (70 ml) coconut oil, melted
- 1 tablespoon maple syrup or sugar (optional) for a slightly sweeter crust
For the Vegan Cheesecake Filling
- 1 ½ cups (225 g) raw cashews, soaked for at least 4 hours or overnight, then drained
- 1 cup (240 ml) full-fat coconut cream
- ½ cup (120 ml) maple syrup or agave syrup
- 3 tablespoons fresh lemon juice
- 1 teaspoon vanilla extract
- ⅓ cup (80 ml) melted coconut oil
Optional Toppings
- 1 cup fresh berries (strawberries, blueberries, or raspberries)
- ½ cup berry sauce or compote
- ¼ cup vegan chocolate drizzle
- ¼ cup crushed nuts (almonds, pistachios, or walnuts)
Equipment Needed
- Food processor or high-speed blender – Used to crush the crackers for the crust and blend the cheesecake filling until smooth and creamy. A strong blender helps create a silky texture without graininess.
- Mixing bowl – Helpful for combining the crust ingredients before pressing them into the pan.
- 8-inch springform pan or cake pan – A springform pan works best because the sides release easily, making it simple to remove the cheesecake and keep clean slices.
- Spatula – Used to spread and smooth the filling evenly over the crust. It also helps scrape every bit of the creamy mixture from the blender.
How to Make No-Bake Vegan Cheesecake (Step-by-Step)
Step 1: Prepare the Crust
Start by adding the graham crackers or vegan digestive biscuits to a food processor. Pulse until they turn into fine crumbs. The texture should look similar to coarse sand.
Transfer the crumbs to a mixing bowl. Pour in the melted coconut oil and add the maple syrup if you want a slightly sweeter crust.
Stir until all the crumbs are evenly coated and the mixture holds together when pressed.
Scoop the mixture into your springform pan. Use the back of a spoon or the bottom of a glass to press it firmly into an even layer. Take a moment to press down well so the crust stays together when sliced.
Place the pan in the refrigerator and let the crust chill while you prepare the filling. This helps it firm up and hold its shape.
Step 2: Make the Cheesecake Filling
Drain the soaked cashews and give them a quick rinse. This keeps the flavor clean and smooth.
Add the cashews to a high-speed blender along with the coconut cream, maple syrup, lemon juice, vanilla extract, and melted coconut oil. Blend until the mixture becomes completely smooth.
Pause and scrape down the sides if needed. Keep blending until the filling looks thick, glossy, and silky. A smooth blend here makes the finished cheesecake creamy instead of grainy.
Step 3: Assemble the Cheesecake
Remove the crust from the fridge. It should feel firm and slightly set.
Pour the cheesecake filling directly onto the crust. Use a spatula to spread it evenly across the pan. Smooth the top so the surface looks neat and level.
A smooth top helps the cheesecake set evenly and makes it easier to decorate later.
Step 4: Chill Until Set
Place the assembled cheesecake in the refrigerator. Let it chill for at least 4–6 hours, though overnight works best.
During this time, the coconut oil and cashew mixture will firm up. The filling becomes sliceable and develops a rich cheesecake texture.
Avoid rushing this step. Proper chilling gives you clean slices and the best consistency.
Step 5: Add Toppings and Serve
Once the cheesecake is fully set, carefully remove it from the pan. Transfer it to a serving plate if desired.
Top it with fresh berries, berry sauce, chocolate drizzle, or crushed nuts. Even a simple handful of strawberries can make it look beautiful.
Slice with a sharp knife and serve chilled. Each bite should be smooth, creamy, and full of classic cheesecake flavor.
Tips for the Best Vegan Cheesecake
Soak Cashews Long Enough for a Smoother Texture
Cashews form the creamy base of this cheesecake, so proper soaking matters. Soaking softens the nuts and helps them blend into a smooth filling.
Place the cashews in a bowl and cover them with warm water.
Let them soak for at least 4 hours, or overnight if possible. If you’re short on time, you can soak them in very hot water for about 30 minutes.
Well-soaked cashews blend much more easily. This step helps create that classic cheesecake texture—smooth, thick, and creamy.
Use Full-Fat Coconut Cream for Richness
Full-fat coconut cream adds body and richness to the filling. It helps the cheesecake feel dense and satisfying instead of thin or soft.
Look for canned coconut cream or use the thick layer from a chilled can of full-fat coconut milk. Avoid light versions. They contain more water and won’t give the filling the same creamy structure.
The richness from coconut cream also balances the bright flavor of lemon and the sweetness of maple syrup.
Blend the Filling Thoroughly to Avoid Graininess
A silky filling depends on good blending. Once all the filling ingredients are in the blender, let it run long enough to fully break down the cashews.
Stop once or twice to scrape down the sides. This ensures every bit gets blended evenly. The mixture should look glossy, thick, and completely smooth.
If the filling still looks slightly grainy, blend a little longer. A well-blended filling makes the finished cheesecake taste much more like the traditional version.
Chill Overnight for the Best Consistency
Patience makes a big difference with no-bake cheesecake. While the cake may feel firm after a few hours, chilling it overnight gives the best results.
During this time, the coconut oil sets and the filling becomes fully sliceable. The flavors also settle and blend together.
When you cut into it the next day, the slices will hold their shape. The texture will be firm yet creamy, just like a classic cheesecake.
Flavor Variations
Strawberry Vegan Cheesecake
Strawberry adds a fresh, bright flavor that pairs beautifully with the creamy filling.
To make this version, blend ½ cup fresh or frozen strawberries into the cheesecake mixture before pouring it over the crust.
The filling will turn lightly pink and carry a gentle berry sweetness. For extra flavor, top the finished cheesecake with sliced strawberries or a quick strawberry sauce.
This variation is especially refreshing during warmer months.
Chocolate Vegan Cheesecake
Chocolate turns this dessert into a rich and indulgent treat. Add ¼ cup unsweetened cocoa powder or 120 g melted vegan dark chocolate to the filling while blending.
Blend until the mixture becomes smooth and evenly chocolatey. The result is a deep, creamy cheesecake with a smooth cocoa flavor.
Finish it with chocolate shavings, chocolate drizzle, or a few fresh berries for balance.
Lemon Vegan Cheesecake
If you enjoy a brighter flavor, lemon is a great choice. Increase the lemon juice slightly and add 1 tablespoon lemon zest to the filling.
The zest adds a fresh citrus aroma that lifts the whole dessert. It keeps the cheesecake creamy while giving it a light, refreshing taste.
A few thin lemon slices or a spoonful of berry sauce on top works perfectly with this version.
Mango Vegan Cheesecake
Mango brings a smooth tropical sweetness to the cheesecake. Blend ¾ cup mango puree into the filling mixture until fully combined.
The texture stays creamy, while the flavor becomes fruity and slightly floral. The natural sweetness of mango pairs nicely with the rich base.
For a simple finish, spread a thin layer of mango puree over the top before serving.
Peanut Butter Vegan Cheesecake
Peanut butter creates a thicker, nuttier version of this dessert. Add ⅓ cup smooth peanut butter to the filling before blending.
The flavor becomes rich and slightly salty, which balances well with the sweet crust. Blend until the filling is completely smooth.
Top with crushed peanuts or a light chocolate drizzle for a classic peanut butter and chocolate combination.
Storage Tips
This cheesecake stores very well, which makes it a great dessert to prepare ahead of time. Keep it covered in the refrigerator, and it will stay fresh for up to 5 days.
A springform pan with plastic wrap or an airtight container works best to prevent it from absorbing other fridge odors.
If you want to store it longer, slice the cheesecake and place the pieces on a tray lined with parchment paper. Freeze the slices until firm, then transfer them to a freezer-safe container or bag.
This keeps them protected and makes it easy to grab a single serving whenever you want. Frozen slices keep well for up to 2 months without losing their creamy texture.
When you’re ready to enjoy a slice, take it out of the freezer and let it sit at room temperature for 10–20 minutes.
Final Thoughts
This no-bake vegan cheesecake is simple to make and delivers a smooth, creamy dessert without any oven time. A quick crust, a blended filling, and a few hours of chilling are all it takes.
Feel free to make it your own. Try different toppings, add fruit, or experiment with the flavor variations.
Give it a try in your kitchen and enjoy the process. If you make it, share how it turned out and what toppings you used.
FAQs
Can I make this vegan cheesecake without cashews?
Yes. You can replace cashews with soaked sunflower seeds or use dairy-free cream cheese for a similar creamy texture.
How long does no-bake vegan cheesecake take to set?
It usually takes 4–6 hours in the refrigerator. For the best texture and clean slices, chilling overnight works best.
Can I freeze vegan cheesecake?
Yes. Slice the cheesecake and freeze the pieces in an airtight container for up to 2 months.
What can I use instead of coconut cream?
You can use thick vegan cream cheese, coconut milk (chilled and using only the thick part), or vegan heavy cream alternatives for a similar creamy result.

No-Bake Vegan Cheesecake (Creamy, Easy, Dairy-Free)
Course: Vegan DessertsDifficulty: Easy8
Slices20
minutes6
hours20
minutesA smooth and creamy no-bake vegan cheesecake made with a simple biscuit crust and a rich cashew filling. This dairy-free dessert requires no oven and is perfect for gatherings or make-ahead treats.
Ingredients
- For the Crust
1 ½ cups (150 g) graham cracker crumbs or crushed vegan digestive biscuits
5 tablespoons (70 ml) coconut oil, melted
1 tablespoon maple syrup (optional)
- For the Filling
1 ½ cups (225 g) raw cashews, soaked for 4 hours and drained
1 cup (240 ml) coconut cream
½ cup (120 ml) maple syrup
3 tablespoons lemon juice
1 teaspoon vanilla extract
⅓ cup (80 ml) melted coconut oil
- Optional Toppings
Fresh berries
Berry sauce
Vegan chocolate drizzle
Crushed nuts
Directions
- Blend graham crackers into fine crumbs. Mix with melted coconut oil and maple syrup until combined.
- Press the mixture firmly into the bottom of an 8-inch springform pan. Chill in the refrigerator while preparing the filling.
- Add soaked cashews, coconut cream, maple syrup, lemon juice, vanilla extract, and melted coconut oil to a blender. Blend until completely smooth and creamy.
- Pour the filling over the chilled crust and smooth the top with a spatula.
- Refrigerate for 4–6 hours or overnight until the cheesecake is firm.
- Add your favorite toppings, slice, and serve chilled.
Notes
- Soak cashews well for the smoothest texture.
- Chill overnight for cleaner slices and better firmness.
- Store in the refrigerator for up to 5 days or freeze slices for up to 2 months.
Daisy Roots is the home cook and recipe developer behind this kitchen. She creates simple, tested vegan recipes using everyday ingredients. Every dish is developed and cooked in her own kitchen, with clear steps to help you get reliable results every time. Thanks for stopping by — let’s cook something great!