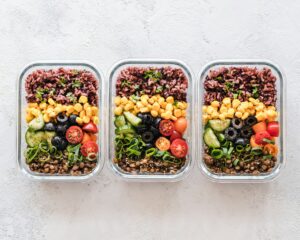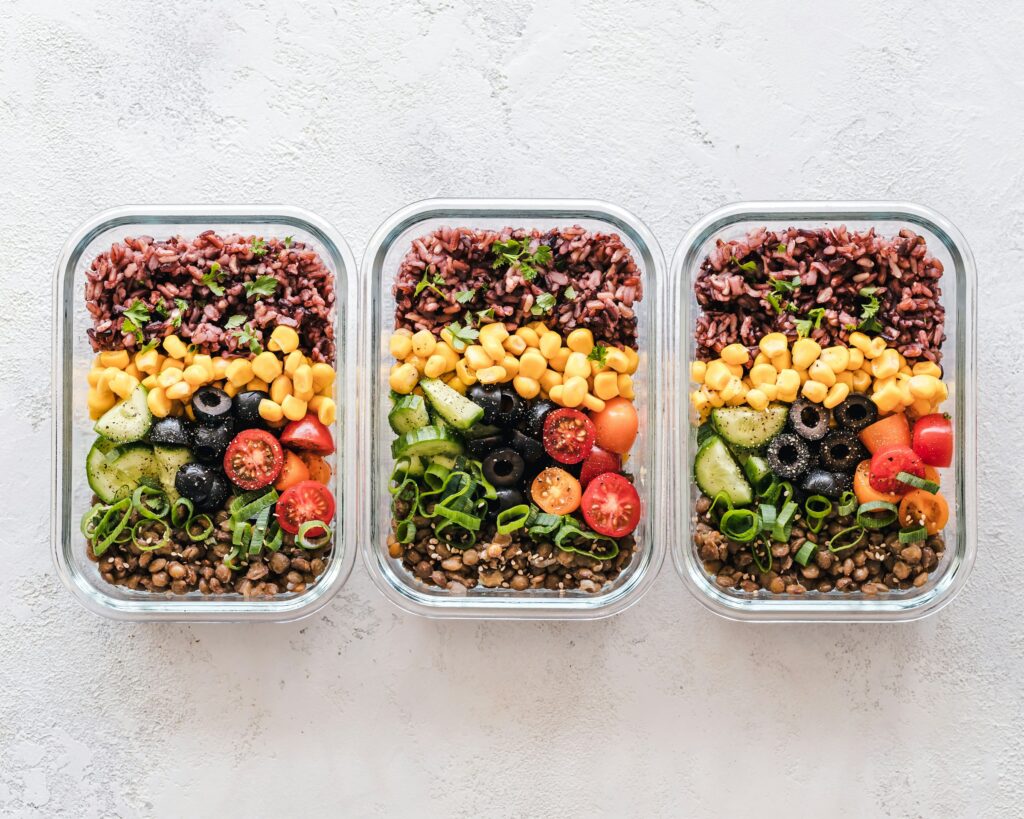
The right container can make vegan meal prep much easier. It helps keep meals fresh, prevents leaks, and makes it simple to grab breakfast, lunch, or dinner when you’re short on time.
Not every container works the same, though. Some are better for freezing, others are perfect for salads or grain bowls, and a few are designed to keep soups and sauces safely stored without spills.
Choosing the right one also helps preserve the texture and flavor of your meals, so they taste just as good when you’re ready to eat them.
In this guide, you’ll discover the best containers for vegan meal prep, learn the pros and cons of different materials, and find practical tips for storing everything from overnight oats to hearty plant-based dinners with confidence.
| If You Mostly Prep… | Best Container |
|---|---|
| Grain bowls | Glass or BPA-free plastic |
| Salads | Deep glass container + dressing cup |
| Soups | Leak-proof round glass container |
| Overnight oats | Mason jar |
| Smoothies | Silicone freezer bag |
| Snacks | Small airtight container |
What Makes a Good Vegan Meal Prep Container?
Leak-Proof Lids
A secure, leak-proof lid is one of the most important features to look for.
It keeps food where it belongs, whether you’re carrying lunch to work or stacking containers in the refrigerator.
This is especially helpful for soups, curries, pasta sauces, and salad dressings that can easily spill if the lid doesn’t seal properly.
Snap-lock lids with a silicone gasket usually provide a tighter seal than simple press-on lids.
Before packing a container into a lunch bag, give it a gentle tilt over the sink to make sure the lid is fully closed.
That quick check can save you from cleaning up unnecessary spills later.
Durable Materials
The material of your container affects how well it performs and how long it lasts.
Choosing the right one depends on how you cook, store, and reheat your meals.
Glass
Glass containers are a favorite for many home cooks because they don’t absorb food odors or stains.
They’re great for colorful dishes like tomato-based pasta, curries, and roasted vegetables.
Most glass containers can also go from the refrigerator to the microwave after removing the lid, making reheating simple.
Although they’re heavier than other options, they often last for years with proper care.
BPA-Free Plastic
BPA-free plastic containers are lightweight and easy to carry, making them a practical choice for lunches and snacks.
They’re usually less expensive than glass and come in many different sizes.
Look for thicker plastic that resists cracking and warping after repeated use.
If you regularly cook foods with strong colors, expect some staining over time, especially from tomato sauces and turmeric.
Stainless Steel
Stainless steel containers are sturdy, long-lasting, and resistant to dents and scratches.
They’re an excellent option if you want something lightweight without using plastic.
They also won’t absorb food odors, even after storing strongly seasoned meals.
The main thing to remember is that stainless steel should never be placed in the microwave.
Silicone
Silicone containers are flexible, lightweight, and especially useful for freezer storage.
Many collapse when empty, which saves valuable cabinet space.
They’re also handy for storing leftovers, snacks, or meal prep ingredients that don’t require rigid containers.
Food-grade silicone is durable enough for regular use while remaining easy to store.
Appropriate Size
Using the right container size helps meals stay organized and look more appealing.
A container that’s too large leaves unnecessary empty space, while one that’s too small can squash delicate ingredients.
Small containers work well for nuts, fresh fruit, chopped vegetables, dips, and homemade sauces.
Medium containers are ideal for individual lunches like grain bowls, pasta salads, or stir-fries.
Larger containers are perfect for batch-cooked meals, family dinners, or storing roasted vegetables before portioning them out.
Keeping a mix of sizes on hand gives you the flexibility to prepare everything from a quick snack to a full week’s worth of meals.
Stackability
Stackable containers make it much easier to keep your refrigerator neat and organized.
They allow you to use vertical space instead of spreading containers across every shelf.
Matching sets usually stack more securely because the lids and bases are designed to fit together.
The same feature makes freezer storage simpler, helping you find meals without digging through crowded shelves.
When the containers are empty, many nesting designs fit inside one another, freeing up valuable cabinet space.
An organized storage system also makes meal prep faster because everything is easy to find when you need it.
Easy to Clean
Meal prep should save time, not create extra work after every meal.
Containers that are dishwasher-safe make cleanup much quicker on busy days.
Smooth interiors are easier to wash by hand because food is less likely to stick in corners or textured surfaces.
Some materials resist stains better than others, which helps containers stay looking clean after repeated use.
Odor-resistant containers are also worth choosing if you regularly prepare meals with garlic, onions, curry, or rich sauces.
Replacing worn lids or containers that no longer seal properly will help keep your meal prep routine reliable for years to come.
Glass vs Plastic vs Stainless Steel Containers
The material you choose plays a big role in how well your meal prep routine works.
Some containers are better for reheating leftovers, while others are ideal for packing lunches or storing meals in the freezer.
Knowing the strengths and drawbacks of each option makes it easier to choose containers that fit your cooking style and daily routine.
Glass Containers
Glass containers are one of the most popular choices for vegan meal prep because they’re sturdy, versatile, and easy to maintain.
They’re especially useful for meals with bold flavors or colorful sauces since the material doesn’t absorb smells or stains.
Pros
- Doesn’t absorb odors: Glass stays fresh even after storing foods with garlic, onions, curry, or tomato sauce.
- Easy to clean: Food washes off easily, and most glass containers are dishwasher-safe, making cleanup quick.
- Microwave-safe (without the lid): You can reheat meals directly in the container after removing the lid, which saves both time and dishes.
- Excellent for reheating: Glass heats food evenly, making it perfect for pasta, casseroles, grain bowls, roasted vegetables, and leftovers.
Cons
- Heavier: Glass containers weigh more than plastic or stainless steel, so they aren’t always the best option for carrying several meals each day.
- Can break if dropped: While many are made from tempered glass, they can still crack or shatter if they hit a hard floor.
Glass is an excellent choice if you mostly meal prep at home and want a container that stays looking and smelling fresh for years.
Plastic Containers
Plastic containers remain a popular option because they’re lightweight, affordable, and easy to carry wherever you go.
Modern BPA-free plastic containers are available in many shapes and sizes, making them convenient for everything from snacks to full meals.
Pros
- Lightweight: Plastic is easy to pack into backpacks, lunch bags, or coolers without adding much weight.
- Affordable: You can often buy complete matching sets without spending a lot, making them a good option for beginners.
- Great for lunches: Their light weight and durable design make plastic containers especially convenient for work, school, or travel.
Cons
- Can stain from tomato-based meals: Foods like marinara sauce, curry, or chili may leave behind discoloration over time.
- May retain odors over time: Strong ingredients such as garlic, onions, and heavily seasoned sauces can sometimes leave lingering smells after repeated use.
If you need containers that are easy to transport and budget-friendly, BPA-free plastic is a practical choice for everyday meal prep.
Stainless Steel Containers
Stainless steel containers are built to last and are a great option if you want something durable without using plastic.
They work particularly well for packed lunches, salads, sandwiches, fruit, and other meals that don’t need reheating in the same container.
Pros
- Extremely durable: Stainless steel resists dents, cracks, and everyday wear, making it a dependable long-term investment.
- Lightweight: Despite being strong, stainless steel is comfortable to carry and works well for meals on the go.
- Long-lasting: With proper care, stainless steel containers can last for many years without losing their performance.
Cons
- Not microwave-safe: Meals must be transferred to a microwave-safe dish before reheating.
- Usually not transparent: Since you can’t see the food inside, you may need labels to quickly identify prepared meals.
Stainless steel is a smart option if durability and portability are your top priorities, especially for cold meals and packed lunches.
| Feature | Glass | BPA-Free Plastic | Stainless Steel |
|---|---|---|---|
| Lightweight | ❌ | ✅ | ✅ |
| Microwave-safe | ✅* | Usually | ❌ |
| Freezer-safe | ✅ | ✅ | ✅ |
| Odor resistant | ✅ | Moderate | ✅ |
| Stain resistant | ✅ | ❌ | ✅ |
| Best for | Home meals | Lunches | Travel |
Best Types of Containers for Different Vegan Meals
Grain Bowls
Grain bowls usually need a medium to large container with enough space to hold grains, vegetables, proteins, and toppings without everything being packed too tightly.
A container with compartments is helpful if you want to keep ingredients separate until you’re ready to eat.
If you’re happy mixing everything together, a single large compartment works just as well and often makes cleanup easier.
Leave a little space at the top of the container so ingredients stay in place when you close the lid.
Salads
Salads stay fresher when they’re stored in deep containers instead of shallow ones.
The extra height keeps leafy greens from getting crushed under heavier ingredients like beans, roasted vegetables, or grains.
Store salad dressing in a small separate container whenever possible.
Adding the dressing just before serving helps the greens stay crisp and prevents the salad from becoming soggy.
If you’re preparing salads for several days, place heavier ingredients at the bottom and delicate greens on top for the best texture.
Soups and Stews
Soups, curries, and stews are best stored in round containers with secure, leak-proof lids.
Round containers are easier to fill, easier to scoop from, and often reheat more evenly than square ones.
If you’re freezing soup, avoid filling the container to the very top.
Leaving about an inch of space allows the liquid to expand as it freezes, helping prevent the lid from popping open or the container from cracking.
Always let hot soup cool before sealing and storing it in the refrigerator or freezer.
Overnight Oats
Overnight oats are perfectly suited to mason jars or small glass containers.
The smaller size creates individual portions that are easy to grab on busy mornings.
Glass jars also make it easy to layer oats, fruit, seeds, and plant-based yogurt without making a mess.
Wide-mouth jars are especially convenient because they’re easier to fill, stir, and eat from.
Smoothie Packs
Smoothie packs are easiest to prepare using freezer-safe reusable containers or silicone storage bags.
These keep chopped fruit, leafy greens, and other smoothie ingredients organized until you’re ready to blend.
Freeze ingredients in individual portions so you can quickly empty one container into the blender without measuring everything again.
Flattening silicone bags before freezing also saves valuable freezer space.
Cut Fruits and Vegetables
Fresh fruits and vegetables stay at their best in small airtight containers or snack-sized boxes.
These containers make it easy to prepare grab-and-go snacks for busy days while helping produce stay fresh longer.
Keeping ingredients separated also helps preserve their texture and flavor.
Preparing several small containers at once makes it much easier to reach for ready-to-eat fruits and vegetables throughout the week.
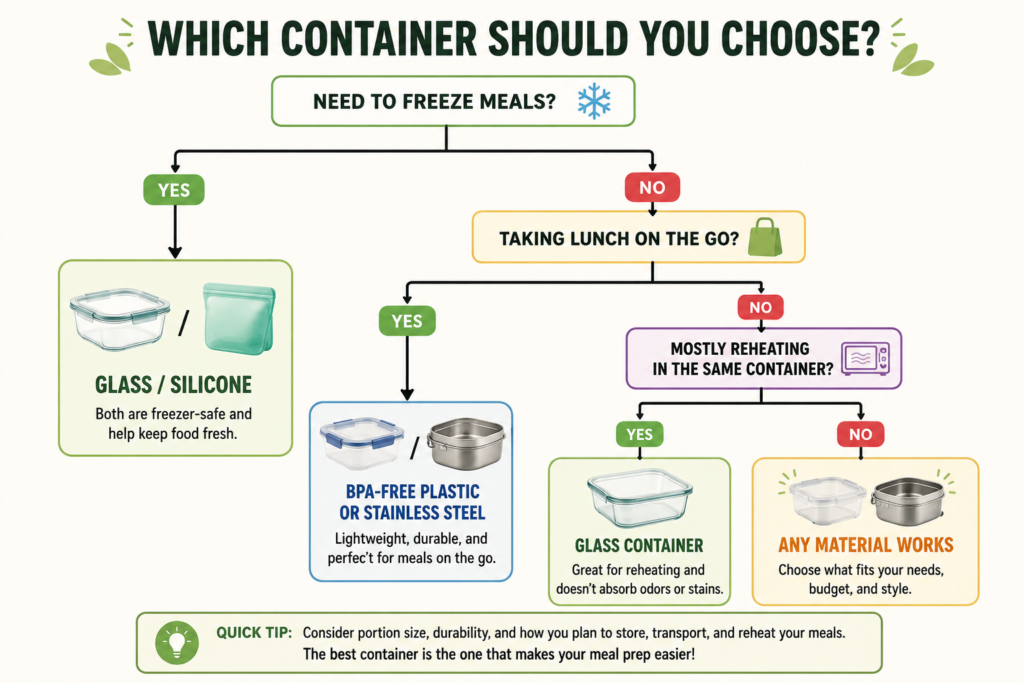
Best Container Materials for Freezing Vegan Meals
Freezing meals is one of the easiest ways to stay ahead during a busy week.
The right container helps protect the flavor and texture of your food while making it easy to thaw and reheat when you’re ready to enjoy it.
Freezer-Safe Glass
Freezer-safe glass containers are an excellent choice if you like cooking large batches of meals ahead of time.
They’re ideal for dishes like soups, curries, pasta bakes, chili, and cooked grains.
Look for containers specifically labeled as freezer-safe, as not all glass is designed to handle freezing temperatures.
Leave a little space at the top before sealing the lid because food naturally expands as it freezes.
Avoid placing a hot glass container directly into the freezer.
Instead, let the food cool first to reduce the chance of the glass cracking from a sudden temperature change.
Heavy-Duty Plastic
Heavy-duty BPA-free plastic containers are another reliable option for freezer storage.
They’re lighter than glass, making them easy to stack and move around, even when you’re freezing several meals at once.
Good-quality plastic containers resist cracking in cold temperatures and are available in a wide range of sizes.
Choose containers with tight-fitting lids to help keep air out and maintain the quality of your meals.
If you’ll be reheating food later, make sure the container is also labeled as microwave-safe.
Silicone Containers
Silicone containers are flexible, lightweight, and well suited for freezer meal prep.
Their flexible sides make it easier to remove frozen food without having to force it out of the container.
Many silicone containers are collapsible, so they take up very little storage space when not in use.
They’re especially handy for freezing soups, sauces, smoothie ingredients, and smaller meal portions.
Food-grade silicone is also durable enough to handle repeated freezing without becoming brittle.
Tips for Preventing Freezer Burn
A few simple habits can help your frozen meals stay fresh and taste their best.
Removing as much excess air as possible before sealing the container helps reduce freezer burn.
Let cooked food cool completely before placing it in the freezer to prevent extra moisture from turning into ice crystals.
Label every container with the meal name and the date it was frozen.
Clear labels make it easy to use older meals first and help you avoid guessing what’s inside each container.
Keeping containers tightly sealed and neatly stacked also helps protect your meals while making your freezer easier to organize.
Features Worth Paying Extra For
Portion Control Compartments
Compartment containers are a great choice if you like keeping ingredients separate until it’s time to eat.
They’re especially useful for meals like grain bowls, roasted vegetables with tofu, wraps with side dishes, or snack boxes.
Separate sections help crunchy foods stay crisp and prevent sauces from soaking into other ingredients too early.
They also make packing balanced meals much quicker because each food has its own dedicated space.
If you enjoy variety in your lunches, compartment containers make every meal look neat and inviting.
Steam Vent Lids
Steam vent lids are designed to release steam while food is reheating in the microwave.
Instead of removing the lid completely, you simply open the small vent before heating.
This helps reduce splatters while allowing steam to escape safely.
Steam vent lids are especially handy for soups, pasta, rice dishes, curries, and other meals that reheat with moisture.
Always check the manufacturer’s instructions to make sure the lid is intended for microwave use.
Locking Snap Lids
A container is only as reliable as its lid.
Locking snap lids create a secure seal that helps prevent leaks during storage or transport.
They’re a smart choice if you regularly pack lunches, carry meals to work, or travel with soups, sauces, or dressings.
A tight seal also helps keep air out, which helps meals stay fresh for longer.
When buying new containers, test that the locking tabs close smoothly and feel secure without requiring excessive force.
Modular Shapes
Containers with modular shapes are designed to stack neatly together.
This simple feature can make a surprising difference when your refrigerator or freezer starts filling up.
Matching containers fit together more efficiently, helping you use shelf space without wasted gaps.
They also make cabinets easier to organize because the lids and bases are often designed to nest together.
If you’re building a meal prep collection, buying one matching set usually creates a tidier kitchen than mixing several different styles.
Measurement Markings
Measurement markings are one of those features you may not think about until you start using them.
Lines printed on the side of the container make it easy to portion soups, grains, sauces, and other prepared ingredients without reaching for measuring cups.
They’re also useful when following recipes that call for specific amounts or when dividing large batches into equal servings.
Even if you don’t measure every meal, having clear markings adds convenience and helps speed up your meal prep routine.
Small features like this often become everyday favorites because they quietly make cooking simpler.
Container Buying Checklist
Before buying meal prep containers, take a minute to check for these practical features.
- Leak-proof lid: Helps prevent spills when storing or transporting meals.
- BPA-free (if plastic): A good choice if you’re buying reusable plastic containers.
- Dishwasher-safe: Makes cleanup quicker and easier after meal prep.
- Freezer-safe: Allows you to store extra meals without damaging the container.
- Microwave-safe (if needed): Lets you reheat meals directly in the container. Always follow the manufacturer’s instructions.
- Stackable design: Saves valuable space in your refrigerator, freezer, and cabinets.
- Available in multiple sizes: Gives you the flexibility to store everything from snacks to family-sized meals.
- Replaceable lids: Makes it easy to extend the life of your container set if a lid becomes damaged.
- Comfortable to carry: Lightweight, easy-to-grip containers are more convenient for lunches, work, or travel.
Container Sizes You Actually Need
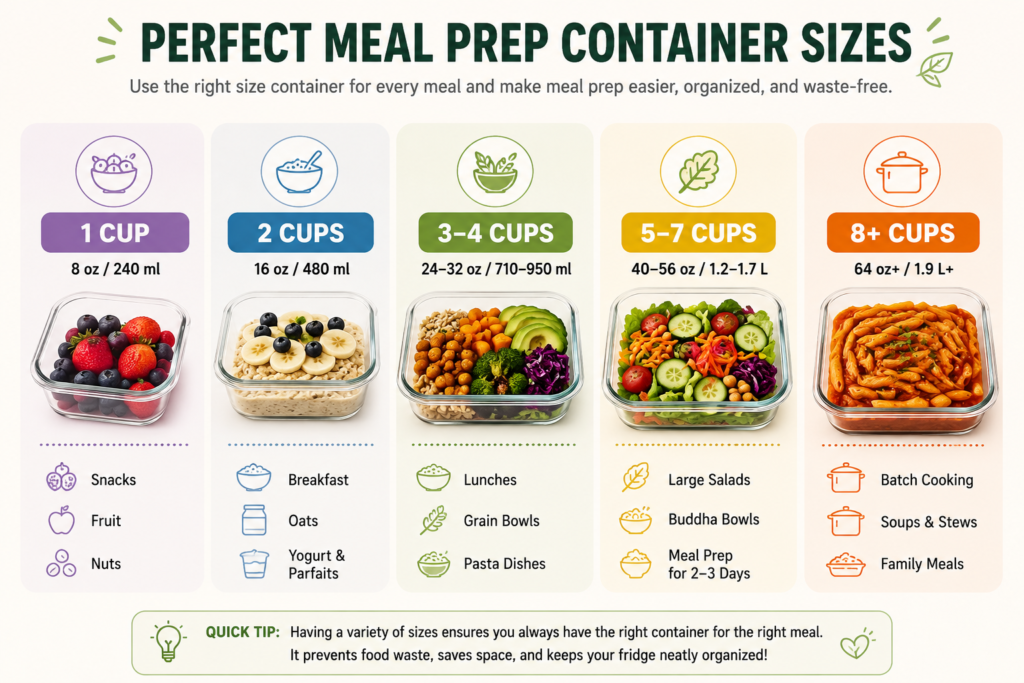
Having a variety of container sizes makes meal prep much easier than relying on one size for everything.
Small containers are perfect for snacks, while larger ones are better for family meals and batch cooking.
Keeping a few of each size on hand gives you the flexibility to prep everything from breakfast to dinner without wasting space.
| Container Size | Best For |
|---|---|
| 1 cup | Snacks, fresh fruit, chopped vegetables, nuts, seeds, dips, and small leftovers |
| 2 cups | Overnight oats, yogurt parfaits, breakfast scrambles, pasta salads, and individual breakfast portions |
| 3–4 cups | Grain bowls, sandwiches with sides, stir-fries, pasta dishes, and most single-serving lunches |
| 5–7 cups | Large salads, family-sized side dishes, roasted vegetables, and meals with several ingredients |
| 8+ cups | Batch cooking, soups, stews, chili, cooked grains, and storing multiple servings before portioning them out |
A 1-cup container is ideal for grab-and-go snacks because it keeps portions convenient without taking up much room in your refrigerator or lunch bag.
A 2-cup container works well for breakfast and lighter meals, giving you enough space to layer ingredients without overcrowding them.
For most people, 3- to 4-cup containers will become the ones they reach for most often.
They’re the perfect size for everyday lunches and dinners while leaving enough room to mix ingredients comfortably before eating.
If you enjoy meal-prepped salads, choose containers that hold at least 5 to 7 cups.
The extra space helps keep leafy greens from being compressed and gives you room to toss the salad before serving.
Large 8-cup or bigger containers are best reserved for batch cooking rather than individual meals.
They’re perfect for storing a large pot of soup, cooked rice, roasted vegetables, or pasta before dividing everything into smaller portions later.
A collection of different sizes is usually more practical than buying an entire set of identical containers.
How Many Meal Prep Containers Should You Own?
The right number of meal prep containers depends on how often you cook and how many people you’re feeding.
There’s no perfect number for everyone, but having enough containers to match your routine makes meal prep much more enjoyable.
Start with a small collection and add more as your needs grow.
Beginners
If you’re new to meal prepping, you don’t need a large collection right away.
A set of 8 to 12 containers is usually enough to prepare a few lunches, dinners, breakfasts, and snacks each week.
Choose a variety of sizes instead of buying all the same container.
This gives you more flexibility as you figure out which sizes you use the most.
Weekly Meal Preppers
If you prepare most of your meals once a week, you’ll benefit from having 15 to 25 containers.
This allows you to portion breakfasts, lunches, dinners, snacks, and leftovers without running out of storage.
Include a combination of small containers for sauces and snacks, medium containers for everyday meals, and a few larger ones for salads or family-sized dishes.
Having a few extra containers also comes in handy when unexpected leftovers need a place to go.
Families
Families usually need a larger collection because several meals are being prepared and stored at the same time.
Around 25 to 40 containers in different sizes is a practical starting point for most households.
Large containers work well for storing family meals and batch-cooked ingredients, while smaller ones are useful for lunches, snacks, and individual servings.
Matching container sets can also make refrigerators and cabinets much easier to organize.
Batch Cooks
If you enjoy spending one day cooking meals for several weeks, you’ll likely need the biggest collection.
Having 30 or more containers allows you to portion meals for the refrigerator while keeping plenty of extras ready for the freezer.
A combination of large storage containers and individual meal-sized containers gives you the most flexibility.
You can store cooked grains, soups, sauces, and roasted vegetables in larger containers before dividing them into ready-to-eat portions.
No matter how many containers you own, quality is usually more important than quantity.
A smaller collection of durable, well-sealing containers will serve you better than cabinets full of mismatched containers with missing lids.
As your meal prep routine grows, you can always add more containers based on the sizes and styles you use most often.
A Great Starter Meal Prep Container Set
If you’re new to meal prepping, you don’t need dozens of containers to get started.
A small collection of versatile sizes can handle most breakfasts, lunches, dinners, snacks, and leftovers.
A well-rounded starter set includes:
| Container | Quantity | Best For |
|---|---|---|
| 1-cup containers | 4 | Snacks, fresh fruit, nuts, dips, and chopped vegetables |
| 2-cup containers | 4 | Overnight oats, yogurt parfaits, breakfasts, and side dishes |
| 3–4-cup containers | 6 | Lunches, grain bowls, pasta dishes, and most dinner portions |
| 5–7-cup containers | 2 | Large salads, family-sized leftovers, and meal prep for multiple servings |
| Small dressing containers | 2 | Dressings, sauces, hummus, salsa, and condiments |
This combination gives you enough flexibility for a full week of meal prep without overcrowding your kitchen cabinets.
As your meal prep routine grows, you can always add more containers in the sizes you use most often.
Helpful Accessories for Vegan Meal Prep
The right accessories can make meal prep smoother without adding extra work.
Most of these items are inexpensive, easy to use, and help keep your meals organized throughout the week.
Small Dressing Containers
Small dressing containers are perfect for storing sauces, vinaigrettes, hummus, salsa, or nut-based dips.
Keeping these ingredients separate prevents salads from becoming soggy and helps roasted vegetables stay crisp until you’re ready to eat.
They’re also useful for packing toppings like toasted seeds, chopped nuts, or dried fruit without mixing them into the meal too early.
Choose containers with secure, leak-proof lids, so they stay sealed inside your lunch bag.
Reusable Silicone Muffin Cups
Reusable silicone muffin cups are surprisingly useful beyond baking.
Place them inside larger meal prep containers to separate small portions without needing extra containers.
They’re perfect for berries, sliced vegetables, crackers, nuts, olives, or bite-sized snacks that you want to keep apart.
Because they’re flexible and dishwasher-safe, they’re easy to clean and can be used again and again.
They’re a simple way to add compartments to containers that don’t already have them.
Reusable Labels
Reusable labels make it easy to keep track of what’s in each container.
Instead of opening several containers to find the right meal, you can quickly read the label and grab what you need.
Write the meal name, the date it was prepared, or any simple note that helps you stay organized.
Using labels also makes it easier for everyone in the household to identify meals without guessing.
Many reusable labels peel off cleanly and can be used over and over again.
Dry-Erase Meal Prep Labels
Dry-erase labels offer even more flexibility because you can update them whenever your meal prep changes.
A quick wipe with a cloth removes the old writing, making them ready for the next batch of meals.
They’re especially helpful if you prepare different recipes every week.
Adding the preparation date to each label also makes it easy to use older meals first and keep your refrigerator organized.
Insulated Lunch Bags
An insulated lunch bag helps keep prepared meals at a steady temperature while you’re away from home.
It’s a practical choice for work, school, road trips, or busy days filled with errands.
Choose one with enough room for your meal container, snacks, drinks, and a small dressing container if needed.
A lunch bag with several pockets also helps keep utensils, napkins, and reusable ice packs neatly organized.
Pairing good containers with a quality insulated lunch bag makes taking homemade vegan meals wherever you go simple and stress-free.
How to Keep Vegan Meals Fresh Longer
Cool Food Before Storing
Let cooked food cool slightly before sealing it in a container.
Packing food while it’s still very hot creates extra steam inside the container.
That moisture can make grains, roasted vegetables, and leafy greens softer than you’d like.
Once the food is no longer steaming, place the lid on the container and transfer it to the refrigerator.
If you’re prepping several meals, spreading hot food into shallow containers helps it cool more quickly.
Store Sauces Separately
Whenever possible, pack sauces, dressings, and dips in their own small containers.
Keeping them separate helps salads stay crisp and prevents roasted vegetables, wraps, and grain bowls from becoming soggy.
It’s also a great way to keep crunchy toppings like nuts, seeds, or crispy chickpeas from losing their texture.
Add sauces just before serving for the freshest flavor and the best bite.
Avoid Overfilling Containers
Leave a little space at the top of each container instead of packing it completely full.
This makes it easier to close the lid securely and helps prevent food from being pressed together.
Meals also reheat more evenly when there’s a bit of room for heat to circulate.
If you’re freezing food, that extra space allows liquids to expand as they freeze without pushing the lid open.
Keep Moisture Under Control
Too much moisture is one of the quickest ways for prepared meals to lose their texture.
Pat washed fruits and vegetables dry before storing them.
A salad spinner or a clean kitchen towel works well for removing excess water from leafy greens.
If you’re packing ingredients with different textures, keep wet items separate from dry ones until you’re ready to eat.
A small piece of paper towel placed in containers with washed greens can also help absorb extra moisture and keep them crisp longer.
Rotate Older Meals First
A simple habit can help reduce food waste and keep your meal prep organized.
Place newer meals behind older ones in the refrigerator so the meals you prepared first are the ones you reach for first.
Adding a label with the meal name and preparation date makes this even easier.
Take a quick look through your refrigerator before each meal prep session.
Using up older meals before cooking a fresh batch keeps your refrigerator tidy and ensures your hard work never goes to waste.
Before You Store Your Meal
Use this quick checklist before placing your meal in the refrigerator or freezer:
- Let hot food cool slightly before sealing the container.
- Make sure the lid is fully closed to create an airtight seal.
- Pack sauces, dressings, and dips in separate containers when possible.
- Leave a little extra space if you’re freezing soups, stews, or sauces to allow for expansion.
- Label the container with the meal name and date if you’ll be storing it for several days.
- Place older meals toward the front of the refrigerator so they’re used first.
Taking a few extra seconds to follow this checklist helps keep your vegan meals fresher, reduces food waste, and makes meal planning throughout the week much easier.
Common Meal Prep Container Mistakes
- Using containers that are too large: Extra empty space allows more air inside, which can reduce freshness and make portions harder to organize.
- Forgetting labels: Labeling containers with the meal name and preparation date helps you quickly identify meals and use older ones first.
- Overpacking salads: Filling containers too tightly can crush leafy greens and delicate vegetables, leaving them less crisp.
- Using damaged lids: Cracked or loose-fitting lids may leak or allow air inside, reducing the quality of your stored meals.
- Mixing wet and dry ingredients too early: Keeping sauces, dressings, and crunchy toppings separate helps preserve the texture of your meals until serving.
- Not checking freezer compatibility: Always use containers labeled as freezer-safe to help prevent cracking, warping, or damage during freezing.
Cleaning and Maintaining Meal Prep Containers
Taking care of your meal prep containers helps them last longer and keeps every meal tasting fresh.
The better you care for your containers, the more reliable they’ll be during your weekly meal prep.
Removing Tomato Stains
Tomato sauces, curries, and foods seasoned with turmeric can leave colorful stains, especially on plastic containers.
Washing containers soon after they’re empty makes stains much easier to remove.
If a stain remains, make a paste with baking soda and a little water, gently rub it onto the stained area, and let it sit for a few minutes before rinsing.
For stubborn stains, placing the clean container in direct sunlight for a few hours can naturally help fade the discoloration.
Glass and stainless steel containers are much less likely to stain, making them a great choice for richly colored meals.
Eliminating Food Odors
Strong ingredients like garlic, onions, and curry can sometimes leave lingering smells behind.
Wash containers with warm water and dish soap as soon as possible after use.
If odors remain, sprinkle a little baking soda inside the container, add warm water, and let it sit before washing again.
Allow containers to dry completely before putting the lids back on.
Trapping moisture inside a sealed container can cause unpleasant odors to develop over time.
Replacing Worn-Out Lids
The lid is just as important as the container itself.
Check lids regularly for cracks, warped edges, or seals that no longer fit tightly.
A damaged lid can lead to leaks and allow extra air into the container, reducing the freshness of your meals.
If replacement lids are available for your container set, replacing only the lid is often more practical than buying an entirely new container.
Proper Storage Between Uses
Storing containers neatly makes meal prep quicker and keeps your cabinets organized.
Nest containers of the same shape and size inside one another to save space.
Store matching lids together in a separate organizer, basket, or drawer so they’re easy to find.
Make sure every container is completely dry before stacking it away.
This simple habit helps prevent trapped moisture and keeps your containers clean, fresh, and ready for your next meal prep session.
Container Lifespan Guide
With proper care, high-quality meal prep containers can last for years.
While the exact lifespan depends on how often they’re used and how well they’re maintained, this guide provides a general expectation.
| Material | Typical Lifespan | When to Replace |
|---|---|---|
| Glass | Many years with proper care | If cracked, chipped, or the lid no longer seals properly |
| BPA-free plastic | Several years, depending on use | If heavily stained, warped, cracked, or retaining persistent odors |
| Stainless steel | Many years | If dented enough to affect the lid or if rust develops |
| Silicone | Several years | If torn, permanently stretched, or no longer seals well |
Actual lifespan varies based on usage, cleaning methods, and overall product quality. Replacing damaged containers promptly helps keep your meal prep organized and prevents leaks during storage or transport.
Expert Kitchen Tips
After years of prepping meals, I’ve found that a few small habits can make meal prep faster, more organized, and much less frustrating.
- Keep one empty container in the refrigerator for leftover chopped vegetables. As you cook throughout the week, add extra veggies to it so they’re ready for your next grain bowl, stir-fry, or salad.
- Buy one matching container set instead of mixing different brands. Uniform containers stack more neatly, take up less cabinet space, and make finding the right lid much easier.
- Replace worn-out lids before replacing the entire container. If the container is still in good condition, a new lid can often restore its leak-proof seal and extend its usable life.
- Store small dressing or sauce containers inside larger meal prep containers while they’re empty. This keeps everything together and prevents small pieces from getting lost in your cabinets.
Final Thoughts
Choosing the right meal prep container doesn’t have to be complicated.
Focus on containers that match the way you cook, store, and enjoy your plant-based meals, and you’ll make meal prep simpler from the start.
Look for options that are durable, easy to clean, and available in sizes you’ll use every week.
The best container isn’t necessarily the most expensive one—it’s the one you reach for again and again because it keeps your meals fresh, organized, and ready whenever you need them.
FAQs
Are glass containers better than plastic for vegan meal prep?
Glass containers are excellent for reheating, resist stains and odors, and are very durable.
Plastic containers are lighter, more affordable, and easier to carry, so the best choice depends on your meal prep routine.
What size containers work best for meal prepping?
A mix of sizes works best. Small containers are ideal for snacks and sauces, medium containers suit most lunches and dinners, and larger containers are perfect for salads and batch-cooked meals.
Can meal prep containers go from freezer to microwave?
Some can, but always check the manufacturer’s instructions first.
Freezer-safe glass and many BPA-free plastic containers are designed for both, although lids often need to be removed before microwaving.
How do you keep salads fresh in meal prep containers?
Use a deep container, keep the dressing in a separate container, and place heavier ingredients at the bottom with leafy greens on top. Add the dressing just before serving.
How many containers do I need for weekly meal prep?
Most people find that 15 to 25 containers in a variety of sizes are enough for a week of breakfasts, lunches, dinners, snacks, and leftovers.
What’s the best way to organize meal prep containers?
Choose matching, stackable containers whenever possible. Nest empty containers together, store lids in one place, and label prepared meals with the name and date so they’re easy to find.
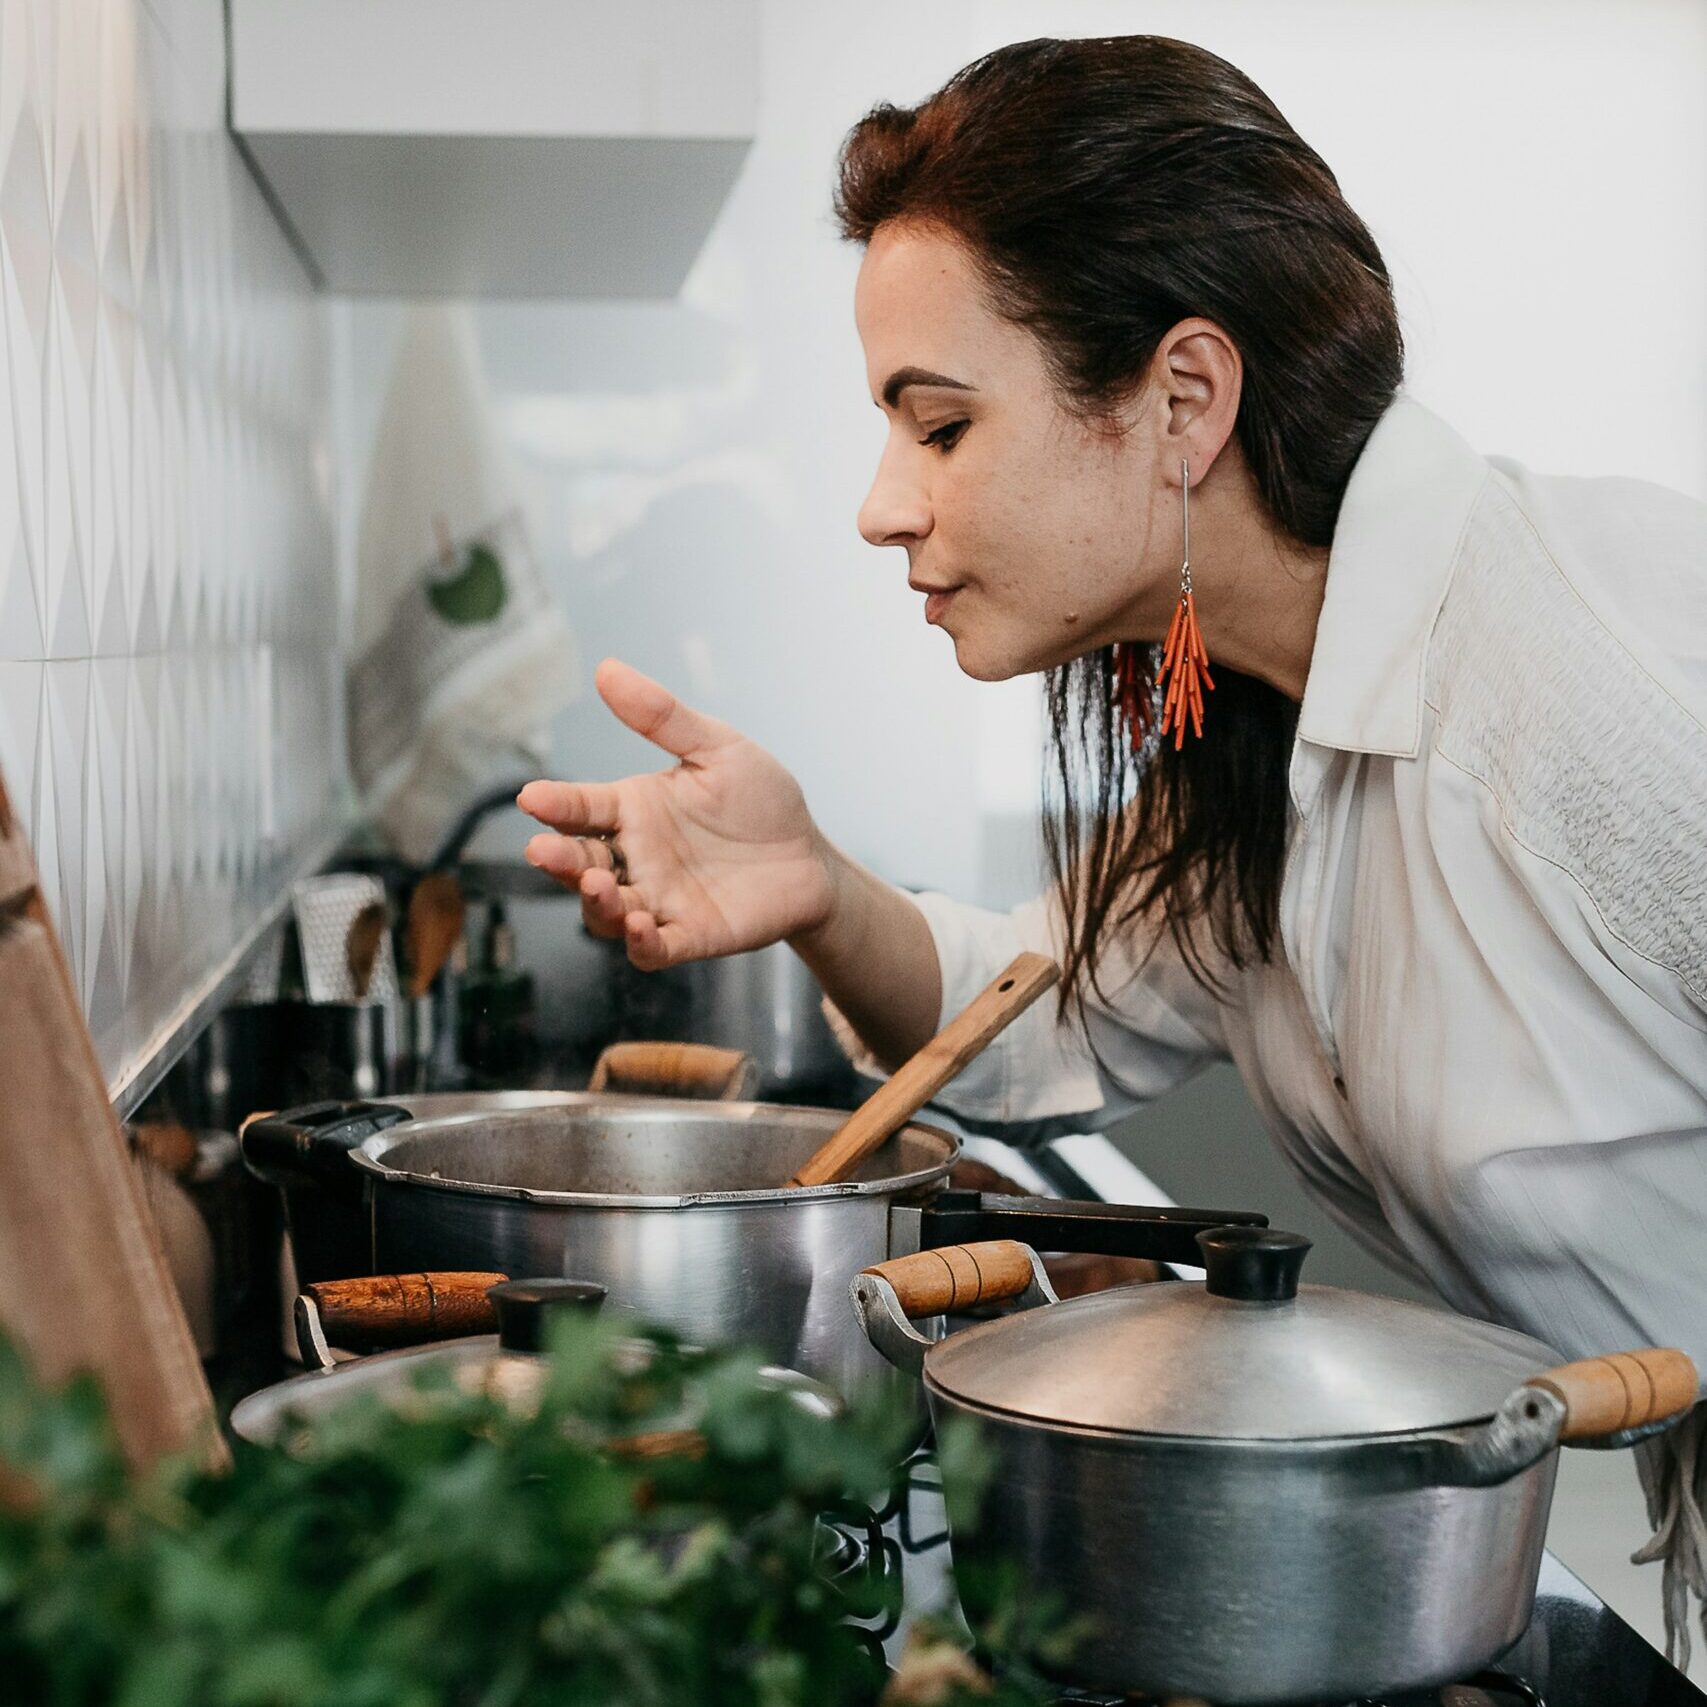
Hi, I’m Daisy Roots, the home cook and recipe developer behind this kitchen. I create simple, tested vegan recipes using everyday ingredients. Every dish is developed and cooked in my own kitchen, with clear steps to help you get reliable results every time. Thanks for stopping by — let’s cook something great!