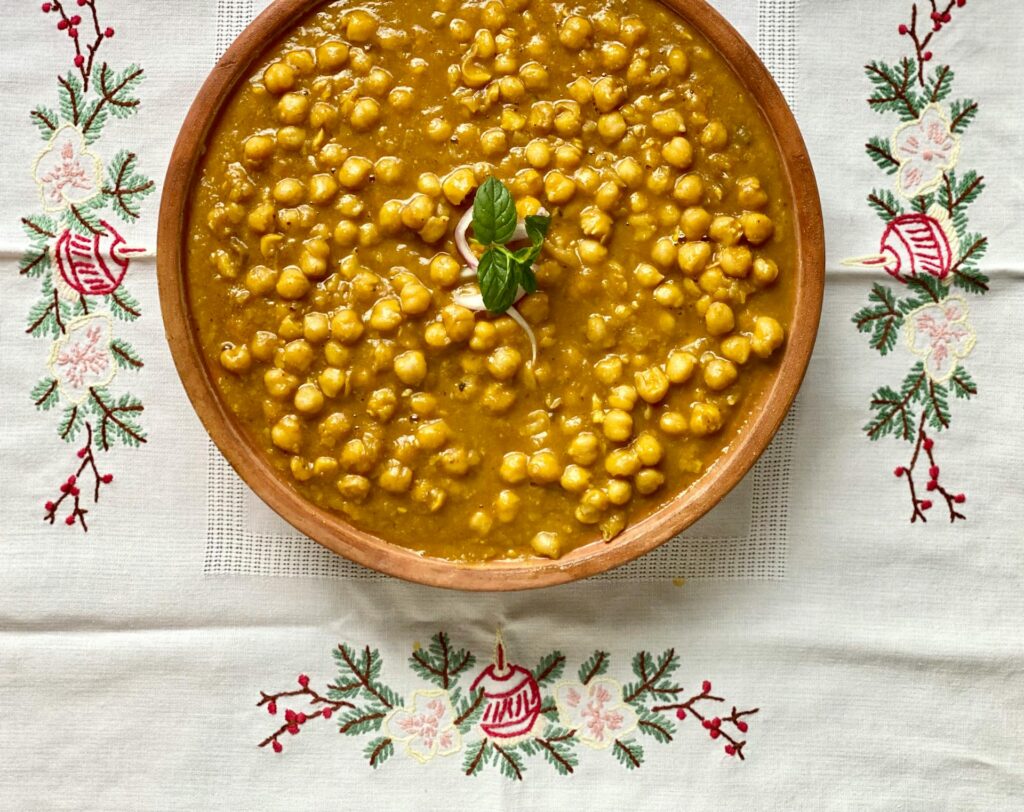
Creamy coconut chickpea curry is a simple dish that delivers big flavor with very little effort.
Tender chickpeas simmer in a rich coconut sauce with garlic, ginger, and warm spices, creating a curry that’s smooth, fragrant, and deeply satisfying.
It’s a favorite vegan comfort meal because it’s filling, easy to make, and made with everyday ingredients you likely already have in your kitchen.
The best part? This curry comes together quickly, uses budget-friendly pantry staples, and tastes like something you’d order at a great restaurant.
Serve it over warm rice or with soft naan for a cozy, flavorful meal.
| Category | Info |
|---|---|
| Prep Time | 10 mins |
| Cook Time | 20 mins |
| Total Time | 30 mins |
| Difficulty | Easy |
| Cuisine | Indian-Inspired |
| Diet | Vegan, Dairy-Free |
| Protein Source | Chickpeas |
| Best Served With | Rice or naan |
Why You’ll Love This Coconut Chickpea Curry
Rich and Creamy Coconut Flavor
The heart of this curry is the coconut milk. It creates a smooth, velvety sauce that coats every chickpea and carries the spices beautifully.
As it simmers, the coconut milk blends with garlic, ginger, and curry spices to build a deep, comforting flavor.
The result is a sauce that’s rich without feeling heavy. It’s creamy, warm, and slightly fragrant. Every spoonful tastes balanced and satisfying, especially when served over hot rice.
Packed with Plant-Based Protein from Chickpeas
Chickpeas make this curry hearty and filling. They hold their shape as they cook and soak up all the flavors from the sauce.
Each bite gives you tender chickpeas surrounded by creamy curry. They add texture, substance, and a satisfying bite that makes this dish feel like a complete meal.
Simple Ingredients and Easy Preparation
This recipe relies on pantry staples and fresh basics you can find almost anywhere. Chickpeas, coconut milk, onion, garlic, spices, and a few simple additions are all you need.
The cooking process is straightforward. Sauté the aromatics, stir in the spices, add the coconut milk and chickpeas, and let everything simmer. The flavors build naturally as the curry cooks.
Perfect for Weeknight Dinners
This curry comes together quickly, making it ideal for busy evenings. Most of the cooking time is hands-off simmering, which gives you time to prepare rice or warm some naan.
It’s the kind of meal that feels comforting and homemade without requiring a long list of steps.
Naturally Vegan and Dairy-Free
The creaminess in this curry comes entirely from coconut milk. That means you get a rich, smooth texture without any dairy.
It’s a great option when cooking for different diets because everyone at the table can enjoy it. No substitutions needed—just simple ingredients working together to create great flavor.
What Does Coconut Chickpea Curry Taste Like?
Coconut chickpea curry is rich, creamy, and deeply comforting with layers of warm, balanced flavor.
The coconut milk gives the sauce a smooth, velvety texture and adds a subtle natural sweetness that softens the spices without making the curry overly sweet.
Garlic and fresh ginger bring a savory, aromatic depth, while the curry powder, cumin, and turmeric create warm earthy notes throughout the dish.
The chickpeas absorb the flavorful sauce as they simmer, making every bite hearty and satisfying.
This curry is usually mild in heat, making it approachable for most people, but it can easily be made spicier with chili flakes or fresh chili peppers.
Served over rice or with naan, it has a cozy, restaurant-style feel that’s both filling and easy to enjoy.
Ingredients You’ll Need
Main Ingredients
- 2 cans (15 oz / 425 g each) chickpeas, drained and rinsed
- 1 can (13.5 oz / 400 ml) full-fat coconut milk
- 1 medium onion, finely chopped
- 3 cloves garlic, minced
- 1 tablespoon fresh ginger, grated
- 1 cup diced tomatoes (or 2 tablespoons tomato paste)
Spices and Seasonings
- 1½ tablespoons curry powder (or 1 tablespoon curry paste)
- ½ teaspoon turmeric
- 1 teaspoon ground cumin
- ½ teaspoon paprika
- ¾ teaspoon salt (adjust to taste)
- ¼ teaspoon black pepper
Optional Add-Ins
- 1 cup fresh spinach or chopped kale
- 1 small bell pepper, sliced
- 1 tablespoon fresh lime juice
- 2 tablespoons fresh cilantro, chopped for garnish
| Ingredient | Best Substitute | Notes |
|---|---|---|
| Chickpeas | Lentils or white beans | Texture changes slightly |
| Coconut milk | Cashew cream | Less coconut flavor |
| Curry powder | Garam masala + cumin | Different flavor profile |
| Spinach | Kale | Add earlier when cooking |
| Lime juice | Lemon juice | Similar acidity |
Kitchen Tools Required
- Large skillet or saucepan – Used to sauté the aromatics and simmer the curry. Choose a pan with enough space so the sauce and chickpeas cook evenly.
- Cutting board – Provides a stable surface for chopping the onion, garlic, ginger, and any vegetables you decide to add.
- Sharp knife – Helps you quickly and safely dice the onion, mince the garlic, and prepare the other ingredients.
- Wooden spoon or spatula – Perfect for stirring the curry as it cooks and scraping the bottom of the pan so the spices don’t stick.
- Measuring cups and spoons – Ensures the right balance of coconut milk, spices, and seasonings for a well-flavored curry.
How to Make Creamy Coconut Chickpea Curry (Step-by-Step)
1. Sauté the Onion, Garlic, and Ginger
Start by heating 1–2 tablespoons of oil in a large skillet or saucepan over medium heat. Once the oil is warm, add the chopped onion.
Cook for about 4–5 minutes, stirring occasionally, until the onion becomes soft and slightly translucent.
Next, add the minced garlic and grated ginger. Stir continuously and cook for about 1 minute.
These ingredients release their aroma quickly, so keep them moving in the pan to prevent burning. This step builds the flavor base of the curry.
2. Add Spices and Cook Until Fragrant
Sprinkle in the curry powder, turmeric, cumin, and paprika. Stir the spices into the onion mixture so they coat everything evenly.
Let the spices cook for about 30 seconds to 1 minute. The heat helps release their natural oils, which deepens the flavor of the curry. Stir frequently so the spices toast gently without sticking.
3. Stir in the tomatoes and Coconut Milk
Add the diced tomatoes or tomato paste to the pan. Stir well so the tomatoes combine with the spices and aromatics.
Pour in the coconut milk and mix until the sauce becomes smooth and evenly colored.
As the sauce warms, it will start to look creamy and slightly thick. Bring the mixture to a gentle simmer.
4. Add Chickpeas and Simmer
Add the drained chickpeas to the sauce and stir so they are fully coated. Reduce the heat to medium-low and let the curry simmer for about 10–12 minutes.
During this time, the chickpeas absorb the flavors of the sauce. The curry will slowly thicken and develop a deeper taste. Stir occasionally to keep everything cooking evenly.
5. Add Greens and Adjust Seasoning
If you’re using spinach or kale, stir it into the curry during the last 2–3 minutes of cooking. The greens will soften quickly in the hot sauce.
Taste the curry and adjust the seasoning. Add more salt, pepper, or a splash of lime juice if needed. Small adjustments here help balance the flavors.
6. Garnish and Serve
Turn off the heat once the curry is rich, creamy, and well seasoned. Sprinkle fresh chopped cilantro over the top for a burst of fresh flavor.
Serve the curry warm over steamed rice, or alongside naan or flatbread. The creamy sauce and tender chickpeas pair perfectly with something that can soak up every last spoonful.
Tips for the Best Coconut Chickpea Curry
Use Full-Fat Coconut Milk for Extra Creaminess
Full-fat coconut milk creates the smooth, rich texture that makes this curry so satisfying. It blends with the spices and tomatoes to form a thick, silky sauce that coats the chickpeas well.
Light coconut milk can work in a pinch, but the sauce will be thinner and less creamy. For the best flavor and texture, stick with full-fat coconut milk.
Give the can a quick shake before opening so the cream and liquid combine evenly.
Simmer the Curry to Deepen the Flavors
Once the chickpeas are added, let the curry simmer gently for several minutes. This step allows the spices, coconut milk, and tomatoes to blend together fully.
A short simmer also helps the sauce thicken slightly. Stir occasionally and keep the heat at medium-low so the curry cooks slowly without boiling too hard.
Balance Flavors with Lime Juice or a Pinch of Sugar
A good curry has balanced flavors. If the sauce tastes a little too rich, a small squeeze of fresh lime juice can brighten everything instantly.
If the tomatoes make the curry slightly acidic, add a tiny pinch of sugar to round out the flavor. These small adjustments help the sauce taste smoother and more balanced.
Toast Spices for Stronger Flavor
Spices release their best flavor when they are warmed in the pan. After sautéing the onion, garlic, and ginger, stir in the spices and cook them briefly before adding liquids.
Even 30–60 seconds of toasting makes a big difference. The spices become more fragrant and flavorful, giving the curry a deeper and more complex taste.
Best Coconut Milk to Use
For the creamiest and most flavorful curry, use canned full-fat coconut milk.
It creates a rich, velvety sauce that blends beautifully with the spices and chickpeas.
Avoid using refrigerated beverage-style coconut milk, since it’s much thinner and won’t give the curry the same creamy texture.
Before opening the can, give it a quick shake to help combine the coconut cream and liquid.
If the coconut milk looks separated when you open it, that’s completely normal.
Simply stir it into the curry as it heats, and the sauce will become smooth and creamy again.
Common Mistakes to Avoid
- Boiling the coconut milk too aggressively – High heat can cause the sauce to separate or become oily. Keep the curry at a gentle simmer for the smoothest texture.
- Under-seasoning the curry – Coconut milk can mellow flavors, so don’t forget to taste and adjust the salt, spices, or lime juice before serving.
- Skipping the spice toasting step – Briefly cooking the spices in oil helps release their flavor and gives the curry a deeper, richer taste.
- Using watery light coconut milk – Full-fat canned coconut milk creates a creamier, more flavorful sauce that works much better in this recipe.
- Not simmering the curry long enough – Letting the curry simmer for several minutes helps the chickpeas absorb flavor and allows the sauce to thicken properly.
Delicious Variations
- Vegetable Chickpea Curry – Add 1–2 cups chopped vegetables such as potatoes, cauliflower, or carrots. Add firm vegetables like potatoes or carrots earlier in the cooking process so they become tender as the curry simmers.
- Spicy Chickpea Curry – Increase the heat by adding ½–1 teaspoon chili flakes or 1 finely chopped fresh chili when you add the spices. Adjust the amount depending on how spicy you like your curry.
- Creamier Curry – For an even richer sauce, stir in 2–3 tablespoons coconut cream during the final few minutes of cooking. This thickens the curry and makes the texture extra smooth.
- Protein Boost – Add 1 cup cubed firm tofu or ½–1 cup cooked lentils along with the chickpeas. These ingredients absorb the curry sauce well and make the dish more filling.
| Spice Preference | Adjustment |
|---|---|
| Mild | Use less curry powder |
| Medium | Add chili flakes |
| Spicy | Add fresh chili + cayenne |
| Extra Hot | Add chili oil before serving |
What to Serve with Coconut Chickpea Curry
Steamed Basmati Rice
Steamed basmati rice is one of the best pairings for coconut chickpea curry. The light, fluffy grains absorb the creamy sauce and carry all the flavors of the curry in each bite.
Cook the rice until tender and separate. Spoon the curry over the top and let the sauce soak in. This simple combination makes the meal satisfying and well-balanced.
Brown Rice or Quinoa
If you want a slightly heartier base, brown rice or quinoa works well. Both hold their texture and pair nicely with the rich coconut sauce.
Cook them according to package instructions and serve the curry over a warm bowl. Their mild flavor allows the spices in the curry to stand out.
Warm Naan Bread or Flatbread
Soft naan or flatbread is perfect for scooping up the curry. The bread soaks up the sauce and makes each bite extra comforting.
Warm the bread briefly in a pan or oven before serving. This keeps it soft and flexible, making it easier to dip into the curry.
Cucumber Salad
A simple cucumber salad adds freshness alongside the rich curry. The crisp texture and cool flavor create a nice contrast to the warm spices.
Slice fresh cucumbers and toss them with a little lime juice, salt, and chopped cilantro. Serve it on the side to brighten the meal and balance the creamy sauce.
Best Toppings for Coconut Chickpea Curry
A few simple toppings can add extra freshness, texture, and flavor to your curry right before serving.
Try one or mix a few together to customize each bowl.
- Fresh cilantro – Adds a bright, fresh finish that balances the rich coconut sauce.
- Toasted coconut flakes – Brings a light crunch and extra coconut flavor.
- Chili oil or chili flakes – Perfect for adding extra heat and depth.
- Sliced green onions – Adds a mild sharpness and fresh texture.
- Dairy-free yogurt alternatives – Creates an even creamier finish and helps mellow the spices.
- Fresh lime wedges – A squeeze of lime brightens the entire dish and balances the richness.
Serving Ideas for Different Occasions
This coconut chickpea curry is versatile enough to work for all kinds of meals and occasions.
- Quick weeknight dinner – Serve it over rice with warm naan for an easy, comforting meal after a busy day.
- Meal prep lunches – Portion the curry into containers with rice or quinoa for simple make-ahead lunches throughout the week.
- Cozy cold-weather meal – The warm spices and creamy coconut sauce make it especially comforting during colder months.
- Vegan dinner party option – Garnish with fresh herbs, lime wedges, and toppings for an impressive plant-based main dish guests will love.
Nutritional Highlights
Coconut chickpea curry is a hearty plant-based meal that’s both satisfying and packed with simple, wholesome ingredients.
Chickpeas provide plant-based protein and fiber, helping make the curry filling and balanced.
Because the recipe uses coconut milk instead of cream or butter, it’s naturally dairy-free and completely vegan.
The coconut milk also adds healthy fats that give the curry its rich, creamy texture.
When paired with rice or vegetables, this curry becomes a comforting and well-rounded meal that works well for both weeknight dinners and meal prep.
Storage and Reheating Tips
Leftover coconut chickpea curry stores very well and often tastes even better the next day as the flavors continue to develop.
Allow the curry to cool slightly, then transfer it to an airtight container and store it in the refrigerator for up to 4 days.
For longer storage, place the cooled curry in a freezer-safe container or freezer bag and freeze it for up to 2 months; just leave a little space at the top because the sauce may expand as it freezes.
When you’re ready to enjoy it again, thaw frozen curry in the refrigerator overnight if possible. Reheat the curry gently on the stove over medium-low heat, stirring occasionally so it warms evenly.
If the sauce has thickened during storage, add a small splash of water or coconut milk to loosen it and bring back its smooth, creamy texture.
Meal Prep & Batch Cooking Tips
This coconut chickpea curry is excellent for meal prep because the flavors become even richer after sitting overnight in the refrigerator.
The spices and coconut sauce continue to develop, making leftovers especially flavorful the next day.
If you’re cooking for the week, you can easily double the recipe and store individual portions in airtight containers for quick lunches or dinners.
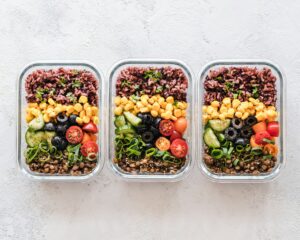
Glass meal prep containers work especially well because they reheat evenly and store the curry securely.
For longer storage, freeze portions in freezer-safe containers for up to 2 months.
Leave a little space at the top since the sauce may expand slightly when frozen.
When reheating, warm the curry gently on the stove or in the microwave and add a small splash of water or coconut milk if the sauce has thickened.
For the best texture, store and reheat rice separately from the curry.
Final Thoughts
Creamy coconut chickpea curry is the kind of recipe that proves simple ingredients can create a rich and satisfying meal.
It’s beginner-friendly, easy to customize, and perfect for busy weeknights when you want something comforting without spending hours in the kitchen.
You can easily make it your own by adjusting the spice level, adding extra vegetables, or experimenting with different toppings and sides.
| Problem | Fix |
|---|---|
| Curry too thick | Add water or coconut milk |
| Curry too thin | Simmer longer uncovered |
| Too spicy | Add extra coconut milk |
| Bland flavor | Add salt + lime juice |
| Too acidic | Small pinch of sugar |
Can I Make This in Advance?
Yes. Coconut chickpea curry is a great make-ahead meal because the flavors continue to develop as it sits.
After a few hours, or even overnight, the spices blend together more deeply, making the curry even richer and more flavorful the next day.
For the best storage, let the curry cool slightly before transferring it to an airtight container. Store it in the refrigerator for up to 4 days.
When reheating, warm the curry gently on the stove or in the microwave, stirring occasionally for even heating.
If the sauce has thickened during storage, add a small splash of water or coconut milk to loosen it.
As we mentioned earlier, this curry also freezes well.
Store cooled portions in freezer-safe containers for up to 2 months, then thaw overnight in the refrigerator before reheating.
FAQs
Can I use dried chickpeas instead of canned?
Yes. Cook the dried chickpeas first until tender, then use about 3 cups of cooked chickpeas in place of canned.
Is coconut chickpea curry spicy?
Not usually. This recipe is mild and flavorful, but you can add chili flakes or fresh chili if you want more heat.
Can I make this curry ahead of time?
Yes. The flavors often become even better after a few hours or the next day, making it great for meal prep.
Can I freeze coconut chickpea curry?
Yes. Let the curry cool completely, store it in a freezer-safe container, and freeze for up to 2 months. Thaw and reheat gently before serving.
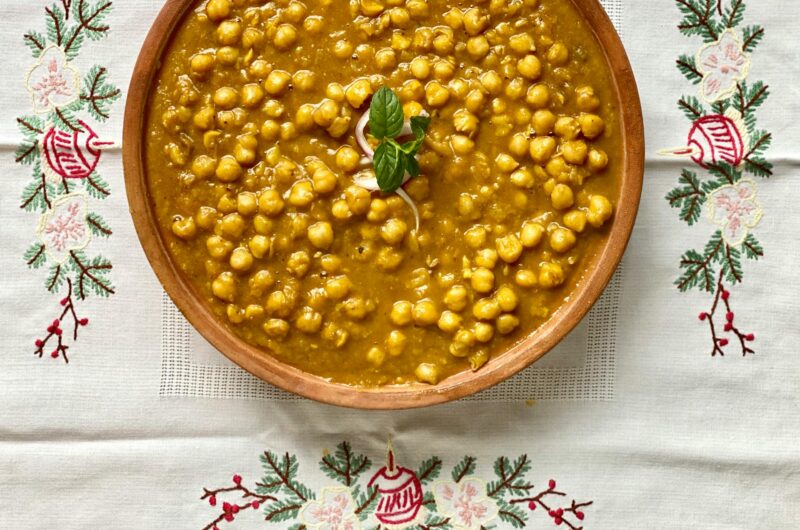
This Creamy Coconut Chickpea Curry Is the Perfect Comfort Meal
Course: Vegan Dinner RecipesDifficulty: Easy4
servings10
minutes20
minutes30
minutesA rich and creamy coconut chickpea curry made with simple pantry ingredients, warm spices, and tender chickpeas. This easy one-pot vegan dish is perfect for a quick and flavorful weeknight meal.
Ingredients
2 cans (15 oz / 425 g each) chickpeas, drained and rinsed
1 can (13.5 oz / 400 ml) full-fat coconut milk
1 medium onion, finely chopped
3 cloves garlic, minced
1 tablespoon fresh ginger, grated
1 cup diced tomatoes (or 2 tablespoons tomato paste)
1½ tablespoons curry powder
½ teaspoon turmeric
1 teaspoon ground cumin
½ teaspoon paprika
¾ teaspoon salt (adjust to taste)
¼ teaspoon black pepper
1 tablespoon cooking oil
1 cup fresh spinach (optional)
1 tablespoon lime juice (optional)
2 tablespoons fresh cilantro, chopped (for garnish)
Directions
- Heat oil in a large skillet over medium heat. Add chopped onion and cook for 4–5 minutes until softened.
- Stir in garlic and ginger and cook for about 1 minute until fragrant.
- Add curry powder, turmeric, cumin, and paprika. Cook for 30 seconds while stirring.
- Add diced tomatoes and coconut milk. Stir well and bring to a gentle simmer.
- Add chickpeas and cook for 10–12 minutes, stirring occasionally.
- Stir in spinach and cook until wilted. Add lime juice if using.
- Taste and adjust salt and pepper. Garnish with fresh cilantro and serve warm.
Notes
- Use full-fat coconut milk for the creamiest texture.
- Add chili flakes or fresh chili if you prefer a spicier curry.
- Serve with basmati rice, quinoa, or warm naan to soak up the sauce.
- Leftovers store well in the refrigerator for up to 4 days.

Hi, I’m Daisy Roots, the home cook and recipe developer behind this kitchen. I create simple, tested vegan recipes using everyday ingredients. Every dish is developed and cooked in my own kitchen, with clear steps to help you get reliable results every time. Thanks for stopping by — let’s cook something great!