Freezing vegan meal prep ingredients is one of the easiest ways to save time, waste less food, and always have fresh ingredients ready when you need them.
Instead of making full meals ahead of time, you can freeze fruits, vegetables, grains, beans, and plant-based proteins in portions that fit your cooking style.
In this guide, you’ll learn which vegan ingredients freeze well, the best ways to store them, and simple tips to keep their flavor and texture at their best.
With a few easy storage habits, you’ll spend less time prepping during the week and more time enjoying homemade meals.
Freezing at a Glance
| Ingredient | Freeze Well? | Prep Needed | Best Freezer Life |
|---|---|---|---|
| Broccoli | ✅ Yes | Blanch | 8–12 months |
| Bell peppers | ✅ Yes | None | 8–12 months |
| Bananas | ✅ Yes | Peel first | Up to 6 months |
| Cooked rice | ✅ Yes | Cool completely | Up to 6 months |
| Chickpeas | ✅ Yes | Cook first | Up to 6 months |
| Tofu | ✅ Yes | Optional | 3–5 months |
| Tomato sauce | ✅ Yes | Cool completely | 2–4 months |
| Lettuce | ❌ No | — | Not recommended |
Understanding Freezer-Friendly Vegan Ingredients
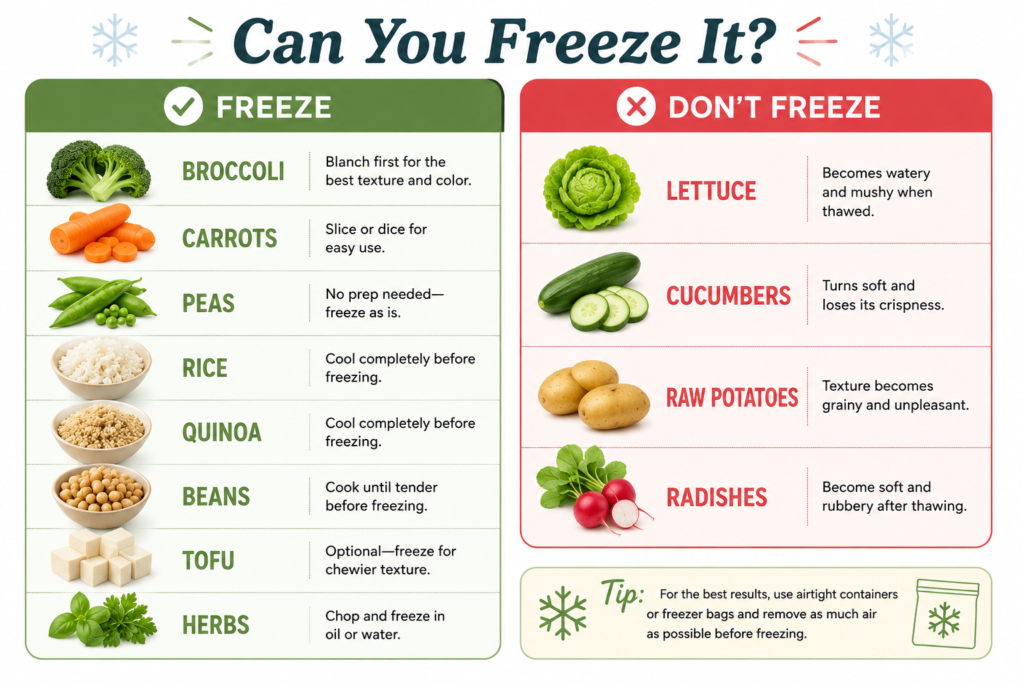
Not every vegan ingredient responds the same way to freezing.
Some foods hold their texture and flavor surprisingly well, while others become watery or mushy after thawing.
Knowing what to freeze and what to keep fresh will help you get better results and make meal prep much easier.
What Foods Freeze Well?
These ingredients freeze well when stored properly and are excellent choices for vegan meal prep:
- Vegetables: Broccoli, cauliflower, carrots, peas, green beans, corn, spinach, and bell peppers all freeze well.
- Fruits: Berries, bananas, mangoes, peaches, pineapple, and cherries are great for smoothies, baking, and desserts.
- Cooked grains: Rice, quinoa, barley, farro, and millet reheat well with very little loss in texture.
- Legumes and beans: Chickpeas, black beans, kidney beans, lentils, and pinto beans freeze beautifully after cooking.
- Nuts and seeds: Almonds, walnuts, pecans, sunflower seeds, and chia seeds stay fresh longer in the freezer and are less likely to become stale.
- Plant-based proteins: Tofu, tempeh, seitan, and many store-bought meat alternatives freeze well and are easy to cook straight from frozen.
What Foods Don’t Freeze Well?
Some ingredients lose their texture or separate after thawing, making them better suited for fresh use.
- Lettuce and delicate greens: These become limp and watery once thawed.
- Cucumbers: Their high water content leaves them soft and mushy after freezing.
- Raw potatoes: They often develop a grainy texture and may darken unless cooked before freezing.
- Plant-based dairy products: Some oat, almond, soy, and coconut-based yogurts, creams, and milks can separate after thawing, although many can still be used in cooking after a good stir.
- Foods with high water content: Ingredients like celery, radishes, and zucchini may lose their crisp texture once frozen.
The Basics of Freezer Burn
Freezer burn happens when food is exposed to air inside the freezer.
The moisture on the surface evaporates, leaving dry, discolored spots that affect both flavor and texture.
The easiest way to prevent freezer burn is to use airtight containers or freezer bags, remove as much air as possible before sealing, and label everything with the date it was frozen.
Keeping your freezer at a steady temperature also helps protect food from moisture loss.
If you notice dry patches, ice crystals inside the package, faded color, or a tough texture after thawing, the food has likely developed freezer burn.
It’s usually still safe to eat, but the quality won’t be as good.
Essential Tools for Freezing Vegan Ingredients
You don’t need a kitchen full of gadgets to freeze vegan meal prep ingredients successfully.
A few reliable storage tools can keep your ingredients fresher for longer, help prevent freezer burn, and make it easier to grab exactly what you need when it’s time to cook.
Best Storage Containers
Choosing the right container helps protect both flavor and texture while making your freezer easier to organize.
- Glass containers: Durable, reusable, and perfect for cooked grains, beans, sauces, and leftovers. Just be sure to leave a little space at the top if you’re freezing liquids, as they expand.
- BPA-free plastic containers: Lightweight and less likely to break than glass. They’re a practical choice for everyday meal prep and stack neatly in the freezer.
- Silicone freezer bags: A reusable alternative to disposable freezer bags. They’re flexible, take up less space, and work well for fruits, vegetables, herbs, and chopped ingredients.
Helpful Freezer Accessories
A few simple accessories can make meal prep faster and keep your freezer organized.
- Labels and markers: Always label containers with the ingredient and freezing date. It saves guessing later.
- Portion trays: Great for freezing individual servings of cooked grains, beans, or chopped vegetables before transferring them to larger containers.
- Vacuum sealers: Removing excess air helps reduce freezer burn and keeps food fresh for longer, especially if you freeze ingredients often.
- Ice cube trays for sauces and herbs: Freeze small portions of pesto, curry paste, tomato sauce, garlic, ginger, or chopped herbs. Once frozen, transfer the cubes to a freezer bag for easy use.
Choosing the Right Container Size
Picking the right size container helps reduce waste and makes meal prep more convenient.
- Single-serving portions: Ideal for quick lunches, smoothies, or recipes that only need a small amount of an ingredient.
- Family-sized meal prep portions: Larger containers work well if you regularly cook for several people or like to prepare multiple meals at once.
- Space-saving strategies: Freeze ingredients in flat freezer bags whenever possible, stack containers neatly, and use square or rectangular containers to make the most of your freezer space.
| Container | Best For | Reusable | Space Saving |
|---|---|---|---|
| Glass | Meals, grains | ✅ | ⭐⭐⭐ |
| Plastic | Vegetables | ✅ | ⭐⭐⭐⭐ |
| Silicone bags | Fruits, herbs | ✅ | ⭐⭐⭐⭐⭐ |
| Vacuum bags | Long-term storage | Sometimes | ⭐⭐⭐⭐⭐ |
How to Freeze Vegetables Properly
Freezing vegetables is one of the easiest ways to make meal prep quicker without sacrificing quality.
A little preparation before freezing helps vegetables keep their color, texture, and flavor, so they’re ready to use whenever you need them.
Should You Blanch Vegetables First?
Blanching is the process of briefly boiling vegetables before quickly cooling them in ice water.
While not every vegetable needs this step, it helps many vegetables stay fresher during long-term freezer storage.
Benefits of Blanching
Blanching helps by:
- Slowing down the natural enzymes that cause vegetables to lose flavor and color over time.
- Preserving a firmer texture after thawing.
- Keeping vegetables looking brighter and fresher.
- Removing some surface dirt and bacteria before freezing.
Vegetables That Require Blanching
For the best results, blanch these vegetables before freezing:
- Broccoli
- Cauliflower
- Carrots
- Green beans
- Corn
- Peas
Each vegetable has a slightly different blanching time, but most only need a few minutes before being transferred to an ice bath.
Vegetables That Can Be Frozen Raw
Some vegetables freeze well without blanching, making prep even easier.
These include:
- Bell peppers
- Onions
- Mushrooms
- Hot peppers
- Chopped celery (best for soups and stews)
Although these vegetables can be frozen raw, washing and drying them well before freezing is still important.
Best Vegetables to Freeze
Many vegetables hold up very well in the freezer and are perfect for soups, stir-fries, casseroles, curries, and pasta dishes.
- Broccoli: Cut into florets and blanch before freezing.
- Cauliflower: Freeze florets after blanching to maintain texture.
- Carrots: Slice, dice, or cut into sticks before blanching.
- Bell peppers: Chop or slice and freeze raw for easy cooking.
- Green beans: Trim the ends and blanch before freezing.
- Corn: Freeze kernels or whole cobs after blanching.
- Peas: Blanch briefly, cool, and freeze in portions.
Step-by-Step Vegetable Freezing Process
1. Wash and prepare vegetables
Rinse vegetables thoroughly under cold water. Remove stems, peels, or damaged spots, then chop them into the sizes you’ll use for cooking.
2. Blanch if needed
Boil vegetables that benefit from blanching for the recommended time, then immediately transfer them to a bowl of ice water to stop the cooking process.
3. Cool completely
Let the vegetables cool fully before freezing. Warm vegetables create extra moisture that can lead to ice crystals.
4. Dry thoroughly
Pat the vegetables dry with a clean kitchen towel or paper towels. Removing excess moisture helps prevent freezer burn and keeps vegetables from sticking together.
5. Freeze on trays
Spread the vegetables in a single layer on a baking tray lined with parchment paper. Freeze for a few hours until firm. This simple step, known as flash freezing, keeps pieces separate so you can remove only what you need later.
6. Transfer to storage containers
Move the frozen vegetables into airtight freezer bags or containers. Remove as much air as possible, label each container with the contents and date, and return them to the freezer until you’re ready to cook.
Common Mistake to Avoid
Freezing vegetables before they’re completely dry can cause ice crystals to form on the surface. After washing or blanching, pat vegetables dry thoroughly before freezing to help preserve their texture and reduce freezer burn.
How to Freeze Fruits for Meal Prep
Frozen fruit is one of the easiest meal prep shortcuts you can keep on hand.
The key is freezing it properly so the pieces stay separate and keep their best flavor.
Best Fruits for Freezing
Many fruits freeze beautifully and can be used straight from the freezer.
- Berries: Strawberries, blueberries, raspberries, and blackberries are perfect for smoothies, oatmeal, and baking. Wash and dry them well before freezing.
- Bananas: Peel bananas first, then slice or freeze them whole. Frozen bananas blend into creamy smoothies and make a great base for dairy-free desserts.
- Mangoes: Peel, remove the pit, and cut into cubes before freezing. They’re delicious in smoothies, fruit bowls, and tropical desserts.
- Pineapple: Cut fresh pineapple into bite-sized chunks for easy snacking or blending.
- Peaches: Slice and remove the pit before freezing. They’re great for crisps, cobblers, and breakfast recipes.
- Cherries: Pit the cherries before freezing to make them ready for smoothies, sauces, and baking.
Preventing Fruit Clumping
Nothing is more frustrating than a frozen block of fruit that won’t come apart.
Flash-Freezing Method
Arrange the prepared fruit in a single layer on a baking tray lined with parchment paper.
Freeze until the pieces are firm, usually for a few hours. Once frozen, transfer the fruit to airtight freezer bags or containers.
Proper Spacing Techniques
Leave a small gap between each piece of fruit while it’s on the tray.
This prevents them from freezing together, making it easy to grab just the amount you need instead of thawing the entire batch.
Using Frozen Fruit in Vegan Recipes
Frozen fruit is incredibly versatile and often doesn’t even need to be thawed before using.
- Smoothies: Blend frozen fruit directly with your favorite plant-based milk for a thick, creamy drink.
- Oatmeal: Stir frozen berries or chopped fruit into hot oatmeal as it cooks for natural sweetness and extra flavor.
- Baking: Add frozen fruit straight into muffin, pancake, bread, or cake batters. If using larger fruits like peaches or mangoes, there’s no need to thaw them first.
- Desserts: Use frozen fruit in sorbets, fruit crumbles, compotes, pies, or homemade vegan ice cream for an easy, flavorful treat.
| Ingredient | Best Uses |
|---|---|
| Frozen spinach | Pasta, soups |
| Frozen peppers | Stir-fries |
| Frozen berries | Smoothies |
| Frozen bananas | Nice cream |
| Frozen tofu | Curries |
| Frozen beans | Chili |
| Frozen herbs | Sauces |
Common Mistake to Avoid
Freezing large piles of fruit without flash-freezing first causes the pieces to stick together into one solid block. Spread fruit in a single layer on a baking tray until frozen, then transfer it to a freezer bag or container.
Freezing Cooked Grains and Starches
Keeping cooked grains in the freezer is an easy way to cut down on weeknight cooking.
Instead of making rice or quinoa from scratch every time, you can cook a large batch once and freeze it in ready-to-use portions.
When stored properly, most cooked grains reheat well and keep their texture.
Rice Storage Guide
Rice freezes especially well, making it a staple for vegan meal prep.
- White rice: Cooks up fluffy after reheating and freezes well for up to 6 months.
- Brown rice: Its slightly firmer texture holds up nicely in the freezer and can also be stored for up to 6 months.
- Wild rice: Freezes well with its chewy texture intact, making it a great addition to soups, grain bowls, and salads.
For the best results, let cooked rice cool completely before freezing. Portion it into airtight containers or freezer bags and remove as much air as possible before sealing.
Other Grains That Freeze Well
Many cooked grains freeze just as well as rice and can be added to a variety of meals.
- Quinoa: Freezes beautifully and reheats quickly for salads, bowls, and side dishes.
- Farro: Holds its pleasantly chewy texture after thawing and works well in grain bowls and soups.
- Barley: A hearty grain that freezes well for stews, soups, and warm salads.
- Millet: Light and fluffy when reheated, making it a versatile base for both savory and sweet recipes.
Portioning Grains for Easy Meal Prep
Freezing grains in the right portions makes meal prep much more convenient.
Individual Servings
Divide cooked grains into single-meal portions if you usually cook for one. This lets you thaw only what you need and keeps the rest frozen until later.
Family Portions
If you prepare meals for a family, freeze larger portions that are enough for one dinner. This saves time and reduces the number of containers you need.
Freezer Storage Timelines
For the best flavor and texture, use these general storage guidelines:
| Grain | Best Used Within |
|---|---|
| White rice | Up to 6 months |
| Brown rice | Up to 6 months |
| Wild rice | Up to 6 months |
| Quinoa | Up to 6 months |
| Farro | 4–6 months |
| Barley | 4–6 months |
| Millet | 3–6 months |
Label each container with the grain name and freezing date so you can use the oldest batches first.
Common Mistake to Avoid
Freezing cooked grains while they’re still warm traps extra moisture inside the container. Let rice, quinoa, and other grains cool completely before portioning and freezing for the best texture after reheating.
Storing and Freezing Beans and Legumes
Cooked beans and legumes are some of the best foods to keep in your freezer.
They’re filling, versatile, and ready to add to soups, curries, salads, burritos, and grain bowls.
Freezing a large batch means you always have a protein-rich ingredient on hand without needing to cook from scratch.
Why Freeze Cooked Beans?
Cooking dried beans takes time, so freezing them in portions can make everyday meals much easier.
Save Cooking Time
Instead of soaking and cooking beans every week, prepare a large batch once and freeze it. You’ll have ready-to-use beans whenever you need them.
Better Texture Control
Freezing freshly cooked beans helps preserve their texture. You can cook them until they’re just tender, then freeze them before they become overly soft.
Budget-Friendly Meal Prep
Buying dried beans in bulk is often much more affordable than canned beans.
Freezing homemade batches lets you save money while keeping your pantry stocked with convenient meal prep ingredients.
Best Beans for Freezing
These beans and legumes freeze especially well and can be used in a wide variety of vegan recipes.
- Chickpeas: Perfect for curries, salads, roasted snacks, and hummus.
- Black beans: Great for tacos, burritos, soups, and veggie burgers.
- Kidney beans: A hearty choice for chili, stews, and rice dishes.
- Pinto beans: Delicious in refried beans, burritos, and grain bowls.
- Lentils: Green, brown, and black lentils freeze well and are ideal for soups, stews, pasta sauces, and salads.
Freezing Tips for Beans
Cool Before Storing
Allow cooked beans to cool completely before placing them in freezer containers.
Freezing hot food creates extra moisture, which can lead to ice crystals and reduce quality.
Freeze With Cooking Liquid or Without
You can freeze beans with a small amount of their cooking liquid to help keep them moist during storage.
If you prefer, drain them first and freeze them dry. Both methods work well, so choose whichever suits the recipes you make most often.
Portion Recommendations
Freeze beans in the amounts you use regularly. One to two cups per container works well for most recipes, while smaller portions are handy for salads or side dishes.
Label each container with the type of bean and the freezing date, then use them within 3 to 6 months for the best flavor and texture.
Common Mistake to Avoid
Filling containers to the very top when freezing beans can leave no room for expansion, especially if they’re stored with cooking liquid. Leave about ½ inch (1–2 cm) of space to help prevent leaks or cracked containers.
Freezing Plant-Based Proteins
Plant-based proteins freeze surprisingly well and can make meal prep much more convenient.
Tofu Freezing Guide
Tofu is one of the best vegan proteins to freeze. In fact, many people prefer its texture after freezing because it becomes firmer and better at soaking up sauces and seasonings.
Why Freeze Tofu?
Freezing tofu changes its texture in a good way, making it even more versatile in the kitchen.
Changes Texture
As tofu freezes, the water inside expands and creates tiny pockets throughout the block.
After thawing, the tofu becomes firmer, chewier, and more “meaty,” making it perfect for stir-fries, sandwiches, and grilled dishes.
Improves Marinade Absorption
The small pockets created during freezing allow tofu to soak up marinades much more easily. This means bolder flavor in every bite with very little extra effort.
How to Freeze Tofu
There are several easy ways to freeze tofu depending on how you plan to use it.
Whole Blocks
Leave the tofu in its original packaging if it’s unopened, or drain it and wrap it tightly if the package has already been opened.
Freeze the entire block, then thaw it in the refrigerator before pressing out the extra moisture.
Cubed Tofu
Cut tofu into cubes before freezing if you want it ready for quick meals.
Arrange the cubes in a single layer on a baking tray until frozen, then transfer them to a freezer bag or airtight container.
This keeps the pieces from sticking together.
Marinated Tofu
For even more convenience, marinate tofu before freezing. Place the tofu and marinade in a freezer-safe container or bag and freeze them together.
As the tofu thaws, it continues to absorb the flavors, making it ready to cook with very little prep.
Should You Press Tofu Before Freezing?
Pressing tofu isn’t required, but it can improve the final texture depending on how you plan to use it.
- Press before freezing: Removing excess water before freezing creates a slightly firmer texture and frees up more space for marinades to soak in later. This method works well for stir-fries, grilling, and baking.
- Press after thawing: If you freeze tofu without pressing it first, simply thaw it and press out the extra moisture before cooking. Frozen tofu releases water very easily, making this a quick and effective option.
Both methods produce great results, so choose the one that best fits your recipe and meal prep routine.
If you’re unsure, freezing first and pressing after thawing is the easiest approach for most home cooks.
Other Vegan Proteins to Freeze
Several other plant-based proteins also freeze well and are worth keeping on hand.
- Tempeh: Freeze whole blocks or sliced portions. Thaw overnight in the refrigerator before cooking or marinating.
- Seitan: Freeze cooked or uncooked seitan in airtight containers. It keeps its chewy texture well and works in everything from stir-fries to sandwiches.
- Plant-based meat alternatives: Most vegan burgers, sausages, crumbles, meatballs, and chicken-style products are freezer-friendly. Keep them in their original packaging until opened, or transfer leftovers to airtight freezer bags and use them within the recommended storage time for the best quality.
Common Mistake to Avoid
Cooking tofu straight from the freezer without thawing can prevent marinades from soaking in properly. For the best flavor, thaw frozen tofu first, press out the extra moisture, then marinate before cooking.
Preserving Herbs and Flavor Boosters
Fresh herbs and aromatics can quickly lose their freshness if they’re left in the refrigerator too long.
Freezing them is an easy way to keep their flavor on hand for soups, sauces, stir-fries, and countless other recipes.
Freezing Fresh Herbs
Many herbs freeze well and keep much of their flavor, making them perfect for cooked dishes.
- Parsley: Wash, dry, and chop before freezing. It’s great for soups, pasta, and grain bowls.
- Cilantro: Chop the leaves and tender stems, then freeze for curries, tacos, and rice dishes.
- Basil: Basil is best frozen rather than dried since it holds onto more of its fresh flavor. It’s perfect for sauces, pasta, and pesto.
- Dill: Freeze chopped dill for soups, potato dishes, dressings, and dips.
Herb Storage Methods
Chopped in Freezer Bags
Wash and dry the herbs thoroughly before chopping them. Place them in small freezer bags, press out as much air as possible, and freeze them flat.
You can easily shake out the amount you need while the herbs are still frozen.
Herb Cubes with Water
Fill each section of an ice cube tray with chopped herbs, then add a small amount of water.
Once frozen, transfer the cubes to a freezer bag. Drop a cube straight into soups, stews, or sauces as they cook.
Herb Cubes with Olive Oil
Mix chopped herbs with a little olive oil and spoon the mixture into an ice cube tray.
After freezing, move the cubes to a freezer-safe container or bag.
They’re perfect for sautéing vegetables or adding extra flavor to pasta sauces and roasted dishes.
Freezing Aromatics
Aromatics freeze just as well as herbs and can save valuable prep time during the week.
- Garlic: Peel and freeze whole cloves, minced garlic, or garlic paste in small portions.
- Ginger: Freeze whole pieces with the peel on or grate it before freezing. Frozen ginger is easy to grate directly into recipes.
- Onions: Peel and chop onions before freezing. They’re best used in cooked dishes since they soften after thawing.
- Scallions: Slice scallions and freeze them in small bags or containers. Sprinkle them directly into stir-fries, soups, fried rice, and noodle dishes without thawing first.
Freezing Vegan Sauces and Condiments
A good sauce can bring a meal together, and freezing homemade sauces means you can enjoy fresh flavor without making a new batch every time.
Sauces That Freeze Well
Many vegan sauces freeze beautifully when stored in airtight containers.
- Tomato sauce: A classic choice for pasta, pizza, soups, and casseroles. Freeze plain tomato sauce or your favorite homemade recipe.
- Curry sauces: Coconut-based and tomato-based curry sauces freeze well and make quick weeknight dinners much easier.
- Cashew cream sauces: Creamy vegan sauces made with cashews can be frozen successfully. Give them a good stir after thawing to restore a smooth texture if needed.
- Pesto: Basil pesto and other herb-based pestos freeze well and keep their fresh flavor. A thin layer of olive oil on top can help preserve the color.
Best Portioning Methods
Freezing sauces in smaller amounts makes them easier to use and helps reduce waste.
Ice Cube Trays
Ice cube trays are perfect for freezing small portions of sauces, pesto, garlic paste, or curry paste. Once frozen, transfer the cubes to a labeled freezer bag for easy storage.
Small Containers
Small airtight containers work well for larger servings that can be used for pasta dinners, soups, or family meals. Leave a little room at the top since sauces expand as they freeze.
Silicone Molds
Silicone molds make it easy to freeze evenly sized portions that pop out without sticking. They’re especially handy for sauces you use regularly in recipes.
Labeling and Organization Tips
A few simple labeling habits will keep your freezer neat and save you time later.
- Date labels: Write the freezing date on every container or bag so you know which batches to use first.
- Portion labels: Note how much each container holds, such as “½ cup” or “1 cup,” to make meal planning easier.
- Recipe labels: If you freeze several types of sauces, include the name of the sauce or the recipe it’s meant for. This helps you find exactly what you need without opening every container.
Freezer Organization Strategies
A well-organized freezer makes meal prep faster and helps you use ingredients before they lose quality.
Creating a Vegan Meal Prep Freezer System
Categorizing Ingredients
Group similar foods together so everything has its place.
For example, keep fruits in one section, vegetables in another, and store grains, beans, sauces, herbs, and plant-based proteins in their own areas.
This makes it easy to see what you have at a glance.
First-In, First-Out Method
Use older ingredients before newer ones. When you freeze a fresh batch, place it behind the older containers so the oldest food gets used first.
This simple habit helps reduce food waste and keeps your freezer stocked with high-quality ingredients.
Inventory Tracking
Keep a small freezer inventory on a notepad, whiteboard, or your phone. List the ingredients you have and update the list as you add or use items.
It’s a quick way to avoid buying duplicates and makes meal planning much easier.
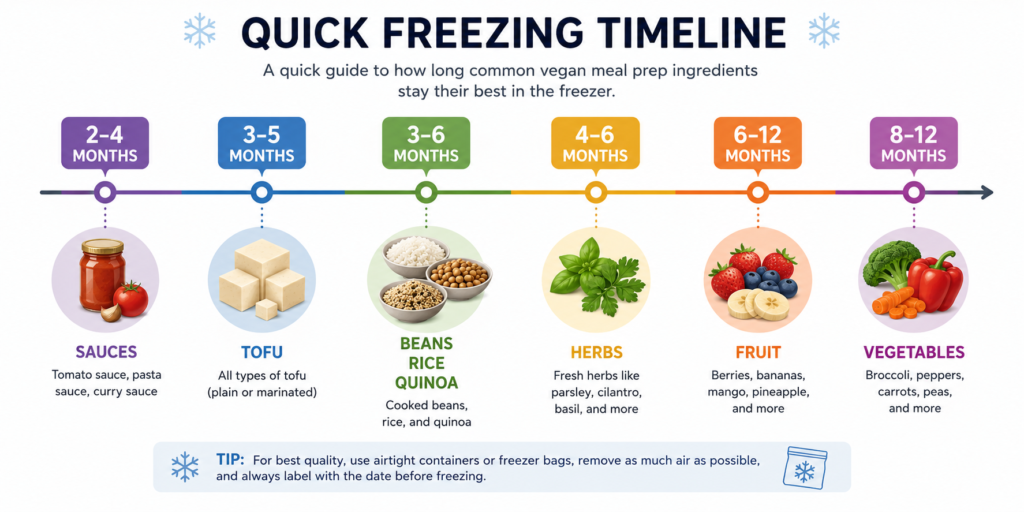
How Long Vegan Ingredients Last in the Freezer
While frozen foods remain safe for longer when stored properly, using them within these time frames will give you the best flavor and texture.
| Ingredient | Recommended Freezer Life |
|---|---|
| Vegetables | 8–12 months |
| Fruits | 6–12 months |
| Cooked grains | 3–6 months |
| Beans and legumes | 3–6 months |
| Tofu | 3–5 months |
| Sauces | 2–4 months |
| Fresh herbs | 4–6 months |
Label every container with the ingredient name and freezing date, then check your freezer regularly to use older items first.
A little organization goes a long way toward making vegan meal prep simple and stress-free.
Safe Thawing Methods
Thawing frozen ingredients the right way helps preserve their flavor and texture while making meal prep easier.
In many cases, you don’t even need to thaw ingredients before cooking.
Best Ways to Thaw Frozen Ingredients
These methods are simple, safe, and work well for most vegan meal prep ingredients.
Refrigerator Thawing
Moving frozen ingredients to the refrigerator is the easiest and most reliable method. Let them thaw slowly overnight or for several hours before using.
This works especially well for tofu, cooked grains, beans, sauces, and larger portions of vegetables.
Cooking Directly from Frozen
Many frozen ingredients can go straight into the pan or pot without thawing first.
Vegetables, fruits, beans, cooked grains, herbs, and sauces all cook well from frozen, making weeknight meals faster and more convenient.
Cold Water Thawing
If you’re short on time, place the sealed container or freezer bag in a bowl of cold water.
Change the water every 30 minutes until the food has thawed. This method is useful for larger portions that need to thaw more quickly.
Thawing Mistakes to Avoid
Avoiding a few common mistakes will help your frozen ingredients stay fresh and ready to use.
Room Temperature Thawing
Leaving frozen food on the kitchen counter for long periods isn’t recommended.
Instead, thaw ingredients in the refrigerator, cook them from frozen, or use the cold water method.
Re-Freezing Thawed Ingredients
Once an ingredient has fully thawed, it’s best to use it rather than freeze it again.
Re-freezing can affect texture and quality, especially for vegetables, tofu, and cooked grains.
Improper Storage After Thawing
After thawing, keep ingredients refrigerated and use them within a few days.
Don’t leave thawed food sitting out, and always return unused portions to the refrigerator until you’re ready to cook.
When Frozen Food Should Be Discarded
Freezing helps food last longer, but it doesn’t keep it fresh forever. If you’re unsure about the quality of an ingredient, it’s always better to be cautious.
Here are a few signs that it’s time to throw it away.
Bad Odor
If an ingredient has an unpleasant or unusual smell after thawing, don’t use it. Fresh frozen food should smell normal once thawed.
Mold
Any visible mold is a clear sign that the food should be discarded immediately. Don’t try to remove the affected area and use the rest.
Broken Packaging
If a freezer bag or container has torn open or no longer seals properly, air can get inside and reduce the quality of the food.
If the ingredient has developed heavy freezer burn or shows other signs of spoilage, it’s best to throw it away.
Severe Dehydration
Large dry patches, tough textures, or excessive freezer burn can make food unpleasant to eat.
While lightly freezer-burned food is often still safe, severely dehydrated ingredients are usually best discarded for quality reasons.
Long Power Outage
If your freezer has been without power for an extended period and the food has completely thawed, it’s safest to discard it.
Partially frozen food with ice crystals may still be safe to refreeze or cook, but fully thawed ingredients should be used immediately or thrown away if you’re unsure how long they’ve been warm.
Unknown Freezing Date
If you don’t know how long an ingredient has been in the freezer, it’s usually best not to take the risk.
Labeling every container with the freezing date makes it much easier to keep track of freshness and avoid unnecessary waste.
Common Freezing Mistakes That Ruin Meal Prep
Overfilling Containers
Foods expand as they freeze, especially liquids like soups and sauces.
Filling containers to the very top can cause lids to pop off or containers to crack. Leave a little space at the top to allow for expansion.
Skipping Labels
It’s easy to think you’ll remember what’s in every container, but after a few weeks, they can all look alike.
Label each container or freezer bag with the ingredient name and the date it was frozen.
This makes meal planning easier and helps you use older ingredients first.
Freezing Warm Food
Always let cooked foods cool completely before freezing. Placing hot food in the freezer creates extra moisture, which can lead to ice crystals and freezer burn.
It can also raise the temperature inside your freezer, affecting nearby foods.
Using Poor-Quality Containers
Thin containers or bags that aren’t designed for freezer use can let air in and cause freezer burn.
Choose sturdy, airtight freezer-safe containers or reusable freezer bags to help keep ingredients fresh for longer.
Not Removing Excess Air
Air is one of the biggest causes of freezer burn. Before sealing freezer bags, press out as much air as possible.
If you’re using containers, choose one that’s close to the size of the food to reduce the amount of empty space inside.
Ignoring Storage Timelines
Even properly frozen ingredients taste best when used within their recommended storage time.
Make it a habit to check dates every so often and use older ingredients before freezing new batches.
A quick freezer clean-out every month can help keep everything fresh and organized.
Weekly Meal Prep Workflow
Follow this simple routine each week to stock your freezer with ready-to-use vegan ingredients.
- Wash fresh produce and remove any damaged or wilted pieces.
- Chop vegetables and prepare fruit into the sizes you’ll use for cooking or baking.
- Cook grains and beans in large batches to save time throughout the week.
- Cool everything completely before packing it for the freezer.
- Portion ingredients into meal-sized servings using freezer-safe containers or bags.
- Label each container with the ingredient name and freezing date.
- Freeze ingredients in an organized way, grouping similar items together.
- Update your freezer inventory so you always know what’s available and what should be used first.
Bonus: Freezer Meal Prep Checklist
Use this quick checklist every time you prepare ingredients for the freezer to keep everything fresh, organized, and ready to use.
- Wash and prepare all fruits, vegetables, and herbs.
- Let cooked foods cool completely before freezing.
- Divide ingredients into meal-sized portions.
- Use airtight, freezer-safe containers or bags.
- Remove as much excess air as possible before sealing.
- Label every container with the ingredient name.
- Record the freezing date on each container or bag.
- Organize similar ingredients together in the freezer.
- Place newer items behind older ones, so you use the oldest food first.
- Check your freezer regularly and use ingredients within their recommended storage time.
💡 Kitchen Tip
Freeze ingredients in the same portions you normally cook with instead of freezing one large batch. Smaller portions thaw more quickly, reduce food waste, and make it much easier to pull together a homemade meal on busy days. It’s a simple habit that saves time every week.
Final Thoughts
Freezing vegan meal prep ingredients is a simple habit that can make cooking easier, save money, and help reduce food waste.
By storing fruits, vegetables, grains, beans, sauces, and plant-based proteins the right way, you’ll always have the basics ready for quick, homemade meals.
If you’re just getting started, begin with a few freezer-friendly staples and build your system over time.
Label everything, freeze ingredients in portions you’ll actually use, and keep your freezer organized.
Before long, meal prep will feel quicker, less stressful, and much more enjoyable.
FAQs
Can you freeze meal-prepped vegan ingredients for several months?
Yes. Most vegan ingredients freeze well for several months when stored in airtight, freezer-safe containers and labeled with the freezing date.
Is frozen produce as nutritious as fresh produce?
In most cases, yes. Fruits and vegetables that are frozen soon after harvesting retain most of their nutrients, making them a great option for everyday cooking.
Should tofu be frozen before cooking?
It depends on the texture you want. Freezing tofu gives it a firmer, chewier texture and helps it absorb marinades more effectively.
What’s the best way to prevent freezer burn?
Use airtight containers or freezer bags, remove as much air as possible before sealing, and avoid storing ingredients longer than their recommended freezer life.
Can you freeze homemade vegan sauces?
Yes. Tomato sauce, curry sauces, cashew cream sauces, and pesto all freeze well. Freeze them in small portions for easy thawing and cooking.
How do you organize a freezer for weekly meal prep?
Group similar ingredients together, label everything with the name and date, keep an inventory if needed, and use the oldest ingredients first to reduce waste.
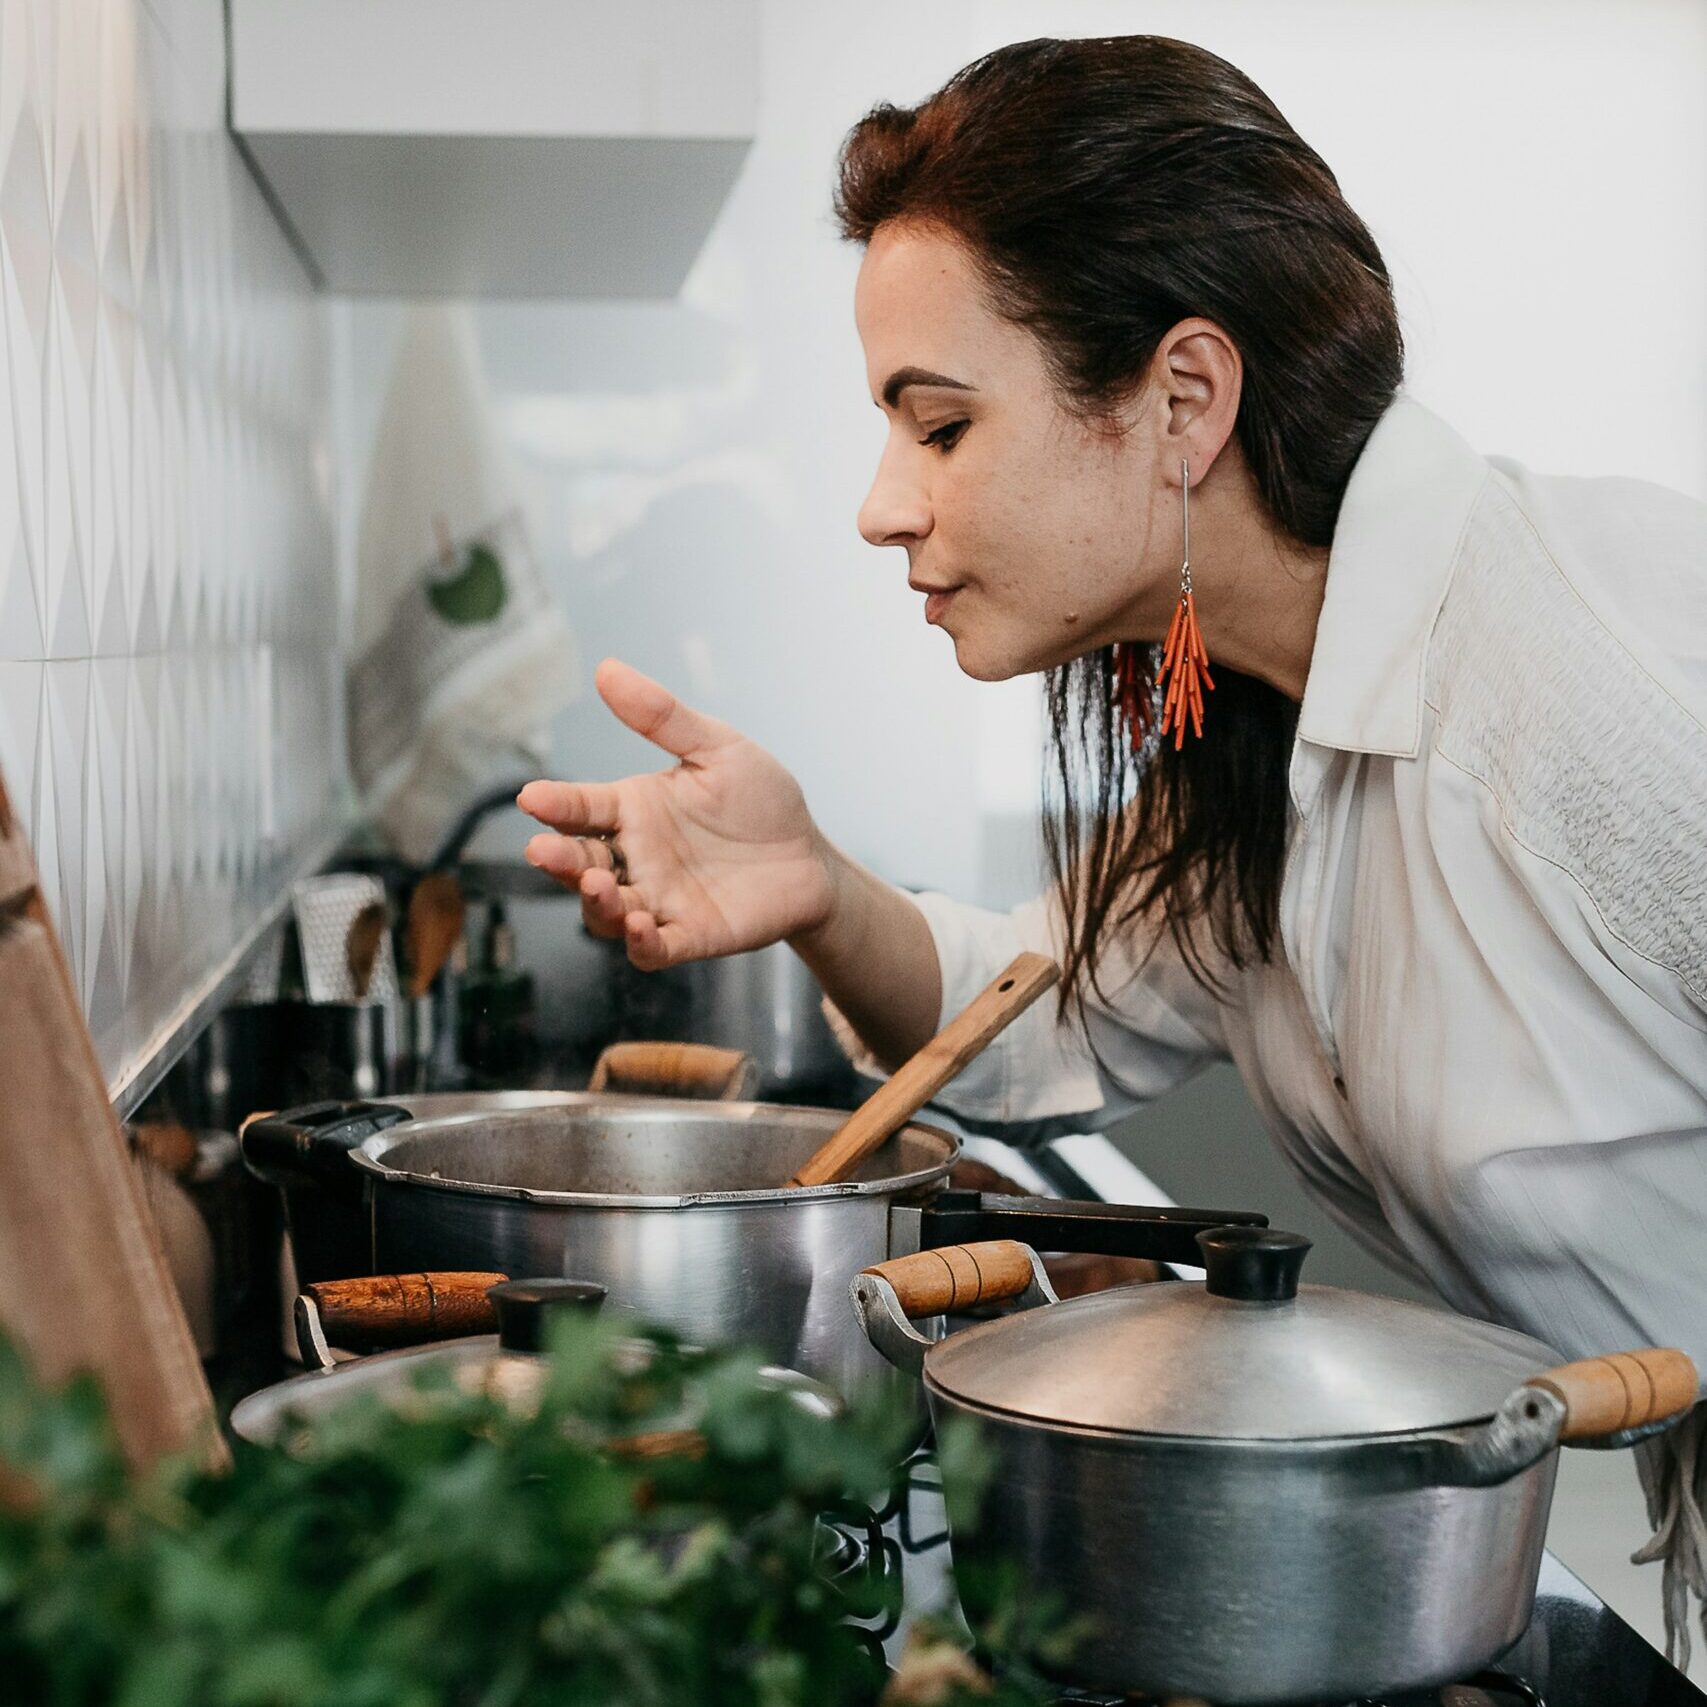
Hi, I’m Daisy Roots, the home cook and recipe developer behind this kitchen. I create simple, tested vegan recipes using everyday ingredients. Every dish is developed and cooked in my own kitchen, with clear steps to help you get reliable results every time. Thanks for stopping by — let’s cook something great!