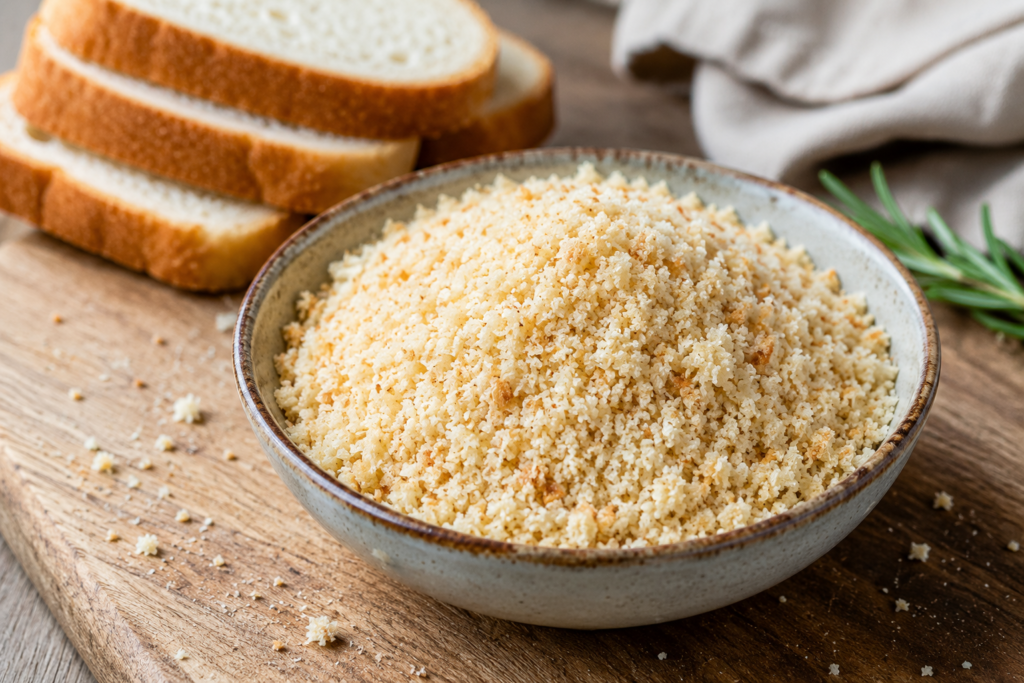
Homemade vegan breadcrumbs are one of the easiest kitchen staples you can make.
They add a crispy finish to baked dishes, create crunchy coatings, and give extra texture to your favorite recipes.
The best part? You can make them in just a few simple steps using bread you already have at home.
While many plain breadcrumbs are naturally vegan, making your own gives you complete control over the ingredients, texture, and seasonings.
It’s also a great way to use up leftover bread instead of letting it go to waste, and it costs much less than buying a new container from the store.
In this guide, you’ll learn how to make homemade vegan breadcrumbs from scratch, choose the best bread, create different textures, add your favorite seasonings, and store them so they’re always ready for your next recipe.
At-a-Glance Recipe Summary
| Detail | Information |
|---|---|
| Prep Time | 10 minutes |
| Drying Time | 20–30 minutes (or 24–48 hours if air drying) |
| Total Time | 30–40 minutes |
| Yield | About 2–2½ cups of breadcrumbs |
| Difficulty | Easy |
| Storage | Pantry: Up to 2 weeks • Refrigerator: Up to 1 month • Freezer: Up to 3 months |
What Are Vegan Breadcrumbs?
Vegan breadcrumbs are simply breadcrumbs made from bread that contains no animal-derived ingredients.
They work just like regular breadcrumbs and can be used for crispy coatings, crunchy toppings, stuffing, veggie burgers, meatballs, casseroles, and many other recipes.
You can make them as fine or as coarse as you like, depending on what you’re cooking.
The biggest advantage is that they’re incredibly easy to make at home with just a few basic ingredients and very little effort.
Are Breadcrumbs Naturally Vegan?
In many cases, yes.
Most plain white bread, whole wheat bread, baguettes, and sourdough loaves are naturally vegan, which means the breadcrumbs made from them are vegan too.
That said, it’s always worth taking a quick look at the ingredient list before you start.
Some breads contain ingredients like milk, butter, eggs, cheese, or honey, which means the finished breadcrumbs would no longer be vegan.
Flavored breads can also include dairy-based seasonings or other non-vegan ingredients, so checking the label is a good habit if you’re unsure.
If you’re baking your own bread, you already know exactly what’s in it, making homemade breadcrumbs even simpler.
Why Make Them Yourself?
Making vegan breadcrumbs at home is one of the easiest ways to get more out of the bread you already have.
Instead of throwing away slices that have gone a little stale, you can turn them into a versatile pantry staple that works in dozens of recipes.
Homemade breadcrumbs are also much more budget-friendly than buying packaged ones, especially if you bake often.
Another benefit is knowing exactly what goes into every batch.
You can skip preservatives, anti-caking agents, and unnecessary additives that are sometimes found in store-bought versions.
Making your own also lets you choose the texture that best suits your recipe.
Blend them into fine crumbs for binding veggie burgers or making a smooth coating, or leave them slightly coarse for extra crunch on baked dishes.
The flavor is just as easy to customize.
Keep them plain for everyday cooking, or mix in garlic powder, Italian herbs, smoked paprika, nutritional yeast, or your favorite spices to create a breadcrumb blend that’s ready whenever you need it.
Once you’ve made a batch yourself, you’ll see how convenient it is to keep homemade vegan breadcrumbs on hand for quick weeknight meals and everyday cooking.
💡 Food Waste Tip
Don’t throw away leftover bread ends, hamburger buns, hot dog buns, or half-used baguettes. Instead, place them in a freezer-safe bag and keep adding to it whenever you have extra bread. Once you’ve collected enough, thaw the bread if needed, dry it completely, and turn it into a fresh batch of homemade breadcrumbs. It’s an easy way to reduce food waste and always have breadcrumbs ready for your favorite recipes.
Ingredients You’ll Need
Best Types of Vegan Bread
Use about 8 slices (8–10 ounces / 225–285 g) of your preferred vegan bread, which makes approximately 2 to 2½ cups of breadcrumbs.
- White bread – Creates light, fine breadcrumbs with a mild flavor that works well in almost any recipe.
- Whole wheat bread – Adds a slightly heartier texture and a subtle nutty taste.
- Sourdough – Gives breadcrumbs a crisp texture and a mild tang that pairs well with roasted vegetables and baked dishes.
- Ciabatta – Produces airy, coarse breadcrumbs that are perfect for crunchy toppings.
- Baguette – Makes crisp, sturdy breadcrumbs that hold their texture beautifully.
- Sandwich bread – An everyday option that’s easy to find and blends into soft, even crumbs.
- Gluten-free vegan bread – A great alternative if you need gluten-free breadcrumbs. Just be sure the bread is labeled both gluten-free and vegan.
Optional Seasonings
If you’d like seasoned breadcrumbs, add the following to every 2 cups of plain breadcrumbs:
- 1 teaspoon garlic powder
- 1 teaspoon onion powder
- 1 teaspoon Italian seasoning
- 1 tablespoon dried parsley
- ½ teaspoon smoked paprika
- 2 tablespoons nutritional yeast (for a savory, cheesy flavor)
- ¼ teaspoon ground black pepper
- ½ teaspoon fine sea salt (or adjust to taste)
| Bread | Approximate Yield |
|---|---|
| 4 slices | 1 cup breadcrumbs |
| 8 slices | 2–2½ cups |
| 1 baguette | 3–4 cups |
| 4 hamburger buns | 2–3 cups |
Equipment Needed
Baking Sheet
A large rimmed baking sheet is ideal for drying fresh bread in the oven.
Spread the bread pieces out in a single layer so they dry evenly and become crisp without burning.
If you’re using bread that’s already stale and completely dry, you may be able to skip this step.
Oven or Dehydrator
An oven is the quickest and easiest way to dry bread before turning it into breadcrumbs.
A low oven temperature helps remove moisture without browning the bread too much, giving you light, crisp crumbs.
If you own a food dehydrator, it works just as well.
Simply dry the bread until it feels firm and crisp all the way through.
Food Processor or Blender
A food processor is the easiest tool for making breadcrumbs.
It lets you control the texture with a few quick pulses, whether you want fine crumbs for binding recipes or coarser crumbs for extra crunch.
A high-speed blender also works well if that’s what you have.
Blend in short bursts and check the texture often to avoid turning the breadcrumbs into a powder.
Rolling Pin and Zip-Top Bag (Alternative)
Don’t have a food processor?
No problem.
Place the dried bread pieces into a sturdy zip-top bag, seal it tightly, and crush them with a rolling pin.
This simple method gives you rustic, coarse breadcrumbs that are perfect for crunchy toppings and breaded recipes.
Airtight Storage Container
Once your breadcrumbs have cooled completely, transfer them to an airtight container or glass jar.
Keeping air and moisture out helps the breadcrumbs stay crisp and fresh for longer.
If you’re making a large batch, divide it into smaller containers or freezer bags so you only open what you need each time.
How to Make Homemade Vegan Breadcrumbs (Step-by-Step)
Step 1 – Choose Your Bread
Start with bread that is vegan and free from ingredients like milk, butter, eggs, cheese, or honey.
You can use white bread, whole wheat, sourdough, ciabatta, baguettes, sandwich bread, or gluten-free vegan bread.
Older bread works especially well because it contains less moisture, but fresh bread can also be used after drying it first.
You can stick to one type of bread or combine different varieties to create your own unique flavor and texture.
Step 2 – Dry the Bread
The bread should be completely dry before blending.
Removing the moisture helps create light, crispy breadcrumbs that store well and won’t clump together.
Fresh Bread
If your bread is fresh and soft, cut or tear it into small pieces.
Spread the pieces in a single layer on a baking sheet.
Bake at 250°F (120°C) for about 20 to 30 minutes, flipping the pieces halfway through.
The bread should feel dry and crisp but not deeply browned.
Day-Old Bread
Day-old bread often needs very little drying because it has already lost some of its moisture.
If it still feels slightly soft in the center, place it in the oven for 10 to 15 minutes to finish drying.
Oven Drying
An oven is the fastest and most reliable method.
Using a low temperature dries the bread gently without giving it a toasted flavor unless that’s what you’re aiming for.
Keep an eye on the bread during the last few minutes since thinner slices may dry more quickly than thicker ones.
Air Drying
If you’re not in a hurry, simply leave the bread uncovered on a cooling rack or baking sheet for 24 to 48 hours.
Once it feels completely dry and firm, it’s ready to blend.
This method works best in a cool, dry kitchen.
Step 3 – Break into Pieces
Once the bread is dry, break it into smaller chunks that will easily fit into your food processor or blender.
Keeping the pieces roughly the same size helps them blend more evenly.
Don’t worry about making every piece perfect since the machine will do most of the work.
Step 4 – Blend Until Desired Texture
Place the bread pieces into a food processor or blender.
Pulse in short bursts instead of blending continuously.
Check the texture every few pulses until it looks just right.
Blend a little longer if you want fine breadcrumbs for binding veggie burgers or coating tofu.
Stop sooner if you prefer coarse breadcrumbs for casserole toppings or baked dishes with extra crunch.
Step 5 – Season (Optional)
If you’d like seasoned breadcrumbs, now is the perfect time to add your spices.
Mix in garlic powder, onion powder, Italian seasoning, smoked paprika, dried parsley, nutritional yeast, black pepper, sea salt, or your favorite herb blend.
Pulse a few more times or stir everything together until the seasonings are evenly distributed.
If you’re unsure how much seasoning to use, start with a small amount and add more after tasting.
Step 6 – Toast for Extra Crunch (Optional)
For even crispier breadcrumbs, spread them onto a baking sheet after blending.
Bake at 300°F (150°C) for 5 to 10 minutes, stirring once or twice so they toast evenly.
Watch them closely during the final few minutes because breadcrumbs can brown quickly.
Remove them from the oven as soon as they turn lightly golden and smell fragrant.
Step 7 – Cool Completely
Allow the breadcrumbs to cool completely before transferring them to a container.
Even a small amount of trapped heat can create moisture inside the container, making the breadcrumbs lose their crisp texture.
Cooling only takes a few minutes, but it’s an important step you shouldn’t skip.
Step 8 – Store Properly
Transfer the cooled breadcrumbs to a clean, airtight container or freezer-safe bag.
Store plain or seasoned breadcrumbs in a cool, dry pantry if you plan to use them soon.
For longer storage, keep them in the refrigerator or freezer to help maintain their freshness and crisp texture.
Having a batch of homemade vegan breadcrumbs ready to use makes weeknight cooking quicker, easier, and a little more delicious.
Fine Breadcrumbs vs. Coarse Breadcrumbs
Not all breadcrumbs are the same.
The texture you choose can make a noticeable difference in the finished dish.
Some recipes benefit from smooth, fine crumbs, while others taste better with larger, crunchier pieces.
The good news is that you can easily control the texture when making breadcrumbs at home.
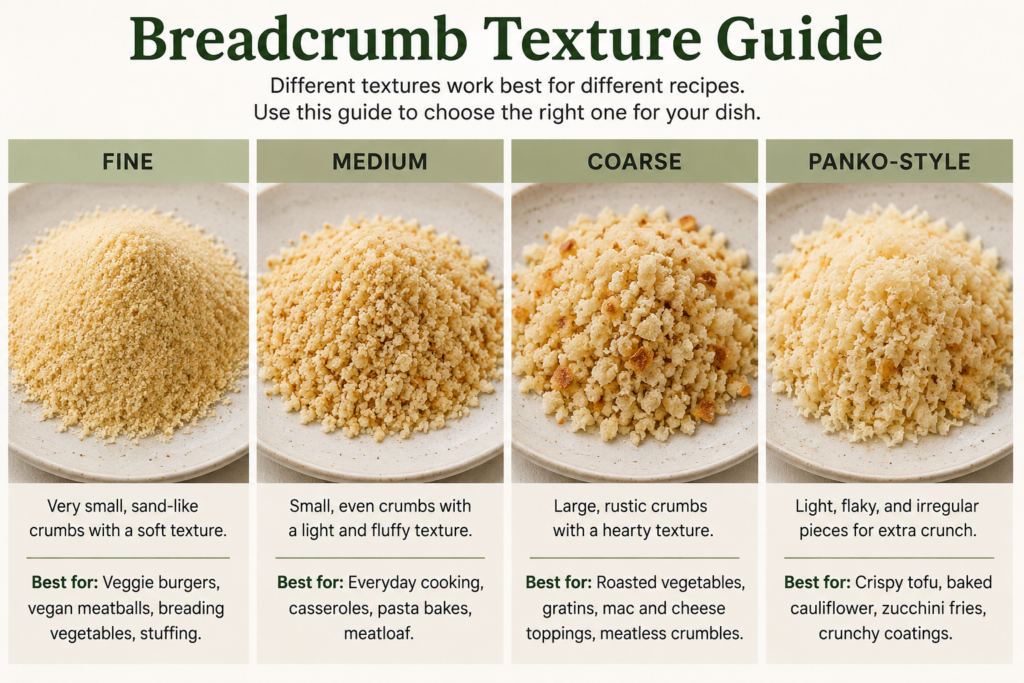
Fine Breadcrumbs
Fine breadcrumbs have a soft, sand-like texture that blends easily into recipes.
They’re made by processing the bread a little longer until the crumbs are small and even.
Fine breadcrumbs are an excellent choice when you want them to mix smoothly with other ingredients instead of standing out.
They work especially well for:
- Binding veggie burgers
- Vegan meatballs
- Stuffing
- Breading tofu or vegetables
- Thickening fillings
- Topping baked pasta when you want a lighter finish
Because the crumbs are smaller, they coat food more evenly and create a thin, consistent crust.
If you’re unsure which texture to make, fine breadcrumbs are a great all-purpose option that works in most recipes.
Coarse Breadcrumbs
Coarse breadcrumbs are larger and more rustic.
They add extra crunch and a heartier texture that stands out after baking or frying.
To make them, simply pulse the bread a few fewer times so some larger pieces remain.
Coarse breadcrumbs are perfect for:
- Casserole toppings
- Baked macaroni dishes
- Stuffed mushrooms
- Roasted vegetables
- Crispy tofu
- Gratins and baked casseroles
The larger pieces toast beautifully in the oven, creating a golden, crunchy topping with plenty of texture.
If you enjoy a little extra crispness in your meals, coarse breadcrumbs are a fantastic choice.
Panko-Style Breadcrumbs
Panko-style breadcrumbs are lighter, larger, and flakier than traditional breadcrumbs.
Instead of looking like small crumbs, they have delicate, airy pieces that create an especially crispy coating.
Traditional panko is made differently from regular breadcrumbs, but you can make a similar version at home by tearing soft bread into rough pieces instead of blending it into fine crumbs.
Dry the torn pieces until crisp, then lightly pulse them so they stay flaky rather than becoming powdery.
Panko-style breadcrumbs are ideal when you want maximum crunch without a heavy coating.
They’re especially good for breaded vegetables, crispy tofu, baked zucchini fries, cauliflower bites, and crunchy toppings that stay light and crisp after cooking.
Best Bread for Homemade Breadcrumbs
The type of bread you use has a big impact on the flavor, texture, and color of your breadcrumbs.
There isn’t one perfect choice because different breads work better for different recipes.
If you have several pieces of leftover bread, don’t be afraid to mix them together.
It’s an easy way to reduce waste while creating breadcrumbs with a balanced flavor and texture.
| Bread Type | Texture | Best For |
|---|---|---|
| White | Fine | Coatings, veggie burgers |
| Whole Wheat | Medium | Stuffing, casseroles |
| Sourdough | Crisp | Roasted vegetables |
| Ciabatta | Coarse | Crunchy toppings |
| Baguette | Crisp | Breading |
| Artisan | Rustic | Gratins, baked pasta |
| Gluten-Free | Varies | Gluten-free recipes |
| Hamburger Buns | Soft | Everyday breadcrumbs |
White Bread
White bread is one of the most popular choices for homemade breadcrumbs.
It has a mild flavor that pairs well with almost any recipe without overpowering the other ingredients.
It also blends into fine, even crumbs with very little effort.
Choose white bread when you want versatile breadcrumbs for coating vegetables, topping casseroles, or mixing into veggie burgers.
Whole Wheat Bread
Whole wheat bread creates slightly darker breadcrumbs with a richer, nuttier flavor.
The texture is usually a little heartier than breadcrumbs made from white bread.
These breadcrumbs work especially well in savory recipes like stuffing, roasted vegetable dishes, and hearty baked meals.
If you enjoy a little more depth of flavor, whole wheat bread is an excellent option.
Sourdough
Sourdough makes wonderfully crisp breadcrumbs with a subtle tang that adds extra character to your cooking.
Its chewy texture dries into sturdy crumbs that toast beautifully.
Sourdough breadcrumbs are delicious sprinkled over baked pasta, roasted vegetables, creamy soups, or stuffed mushrooms.
If you have leftover sourdough that’s becoming stale, this is one of the best ways to use it.
Rustic Artisan Bread
Rustic artisan breads, such as country loaves and crusty farmhouse bread, create coarse, flavorful breadcrumbs with plenty of texture.
The crisp crust adds even more crunch once the breadcrumbs are toasted.
These breadcrumbs are perfect when you want a rustic finish on gratins, casseroles, baked vegetables, or pasta dishes.
Leaving the crust on gives the breadcrumbs extra color and texture, so there’s no need to trim it away.
Gluten-Free Bread
Gluten-free vegan bread is a great choice if you need gluten-free breadcrumbs.
The finished texture can vary depending on the brand, but the method stays exactly the same.
Some gluten-free breads dry more quickly than traditional bread, so check them often while they’re in the oven.
Once blended, they’re just as useful for breading, toppings, and everyday recipes.
Leftover Hamburger or Hot Dog Buns
Don’t overlook leftover hamburger or hot dog buns.
They make soft, light breadcrumbs that work surprisingly well in many recipes.
If the buns have sesame seeds on top, they’ll add a little extra texture and a mild toasted flavor.
This is a simple way to use bread that might otherwise end up in the trash.
Flavor Variations to Try
Italian Herb Breadcrumbs
Italian herb breadcrumbs are a classic choice that pairs well with pasta dishes, casseroles, stuffed vegetables, and baked eggplant.
For every 2 cups of breadcrumbs, mix in:
- 1 teaspoon dried Italian seasoning
- 1 tablespoon dried parsley
- ½ teaspoon garlic powder
- ½ teaspoon onion powder
- ½ teaspoon sea salt
- ¼ teaspoon black pepper
Stir everything together until the herbs are evenly distributed.
The result is a flavorful all-purpose breadcrumb blend you’ll reach for again and again.
Garlic Breadcrumbs
Garlic breadcrumbs add a rich, savory flavor that works beautifully on roasted vegetables, baked tofu, and crispy coatings.
For every 2 cups of breadcrumbs, combine:
- 1 teaspoon garlic powder
- ½ teaspoon onion powder
- ½ teaspoon sea salt
- ¼ teaspoon black pepper
If you enjoy a stronger garlic flavor, you can add an extra ½ teaspoon of garlic powder.
These breadcrumbs also make a delicious topping for vegan pasta bakes and casseroles.
Lemon Herb Breadcrumbs
Lemon herb breadcrumbs bring a fresh, bright flavor that complements lighter dishes.
They’re especially tasty sprinkled over roasted asparagus, green beans, zucchini, or pasta.
For every 2 cups of breadcrumbs, mix together:
- 1 teaspoon dried parsley
- ½ teaspoon dried oregano
- 1 teaspoon finely grated lemon zest
- ½ teaspoon garlic powder
- ¼ teaspoon black pepper
- ½ teaspoon sea salt
If you’re using fresh lemon zest, let the breadcrumbs dry completely before storing them to prevent excess moisture.
For longer storage, it’s best to prepare this variation just before cooking.
Spicy Breadcrumbs
If you like a little heat, spicy breadcrumbs are an easy way to add extra flavor without overpowering the dish.
They’re perfect for coating cauliflower, tofu, zucchini fries, or roasted potatoes.
For every 2 cups of breadcrumbs, stir in:
- 1 teaspoon smoked paprika
- ½ teaspoon chili powder
- ¼ to ½ teaspoon cayenne pepper
- ½ teaspoon garlic powder
- ½ teaspoon onion powder
- ½ teaspoon sea salt
Start with less cayenne if you’re sensitive to spice.
You can always add more the next time you make a batch.
Cheesy Vegan Breadcrumbs (with Nutritional Yeast)
Nutritional yeast gives breadcrumbs a rich, savory flavor that’s often described as cheesy.
It’s a simple way to add extra depth without using dairy.
For every 2 cups of breadcrumbs, combine:
- 2 tablespoons nutritional yeast
- 1 teaspoon garlic powder
- ½ teaspoon onion powder
- ½ teaspoon dried parsley
- ½ teaspoon sea salt
- ¼ teaspoon black pepper
These breadcrumbs are delicious sprinkled over vegan mac and cheese, baked vegetables, stuffed mushrooms, or creamy pasta dishes.
Once you’ve tried a few flavor combinations, you’ll quickly discover your favorites.
Keeping a couple of seasoned batches in your pantry makes it easy to add extra flavor and crunch to everyday meals with almost no extra effort.
| Breadcrumb Flavor | Best With |
|---|---|
| Italian | Pasta, casseroles |
| Garlic | Roasted vegetables |
| Lemon Herb | Asparagus, zucchini |
| Spicy | Cauliflower, tofu |
| Nutritional Yeast | Vegan mac and cheese |
Creative Ways to Use Vegan Breadcrumbs
Homemade vegan breadcrumbs are incredibly versatile and can add flavor, texture, and crunch to a wide variety of dishes.
Here are some of the best ways to use them in your everyday cooking:
- Crispy coating for vegetables – Coat vegetables like zucchini, cauliflower, mushrooms, or green beans before baking or air frying for a delicious crispy finish.
- Vegan meatballs – Mix breadcrumbs into vegan meatball mixtures to help bind the ingredients and create a tender texture.
- Veggie burgers – Add breadcrumbs to homemade veggie burger patties to help them hold together while cooking.
- Casserole toppings – Sprinkle seasoned breadcrumbs over casseroles before baking for a golden, crunchy topping.
- Pasta bakes – Finish baked pasta dishes with a layer of breadcrumbs for extra texture and a lightly toasted crust.
- Stuffed mushrooms – Mix breadcrumbs into the filling or sprinkle them on top for added flavor and crunch.
- Crispy tofu – Coat tofu cubes with breadcrumbs before baking, air frying, or pan-frying for a crispy exterior.
- Eggplant recipes – Use breadcrumbs to coat eggplant slices or as a topping for baked eggplant dishes.
- Vegan mac and cheese topping – Add a layer of seasoned breadcrumbs before baking to create a crispy contrast to the creamy sauce.
- Salad crunch topping – Toast breadcrumbs lightly and sprinkle them over salads for an easy alternative to croutons.
How to Store Homemade Breadcrumbs
Storing your homemade vegan breadcrumbs the right way helps them stay crisp, fresh, and ready to use whenever you need them.
The key is to keep moisture and air away from the breadcrumbs.
Always let the breadcrumbs cool completely before transferring them to a storage container.
Even a little leftover warmth can create condensation, which may cause the breadcrumbs to soften or spoil more quickly.
Pantry Storage
If you plan to use your breadcrumbs within a few weeks, the pantry is a great place to keep them.
Store them in a clean, airtight container or a tightly sealed glass jar.
Place the container in a cool, dry cupboard away from direct sunlight, heat, and humidity.
Properly dried breadcrumbs will usually stay fresh in the pantry for up to 2 weeks.
If you’ve added fresh lemon zest or other fresh ingredients, it’s best to store the breadcrumbs in the refrigerator instead.
Refrigerator Storage
The refrigerator is a good choice if you want your breadcrumbs to last a little longer.
Transfer them to an airtight container or a sealed food storage bag to help keep out moisture.
Properly stored homemade breadcrumbs will usually stay fresh in the refrigerator for up to 1 month.
Before using refrigerated breadcrumbs, give the container a quick shake to loosen any crumbs that may have settled together.
Freezer Storage
The freezer is the best option if you’ve made a large batch.
Divide the breadcrumbs into smaller freezer-safe bags or containers so you can thaw only what you need.
Press out as much air as possible before sealing the bags to help preserve their texture.
Homemade vegan breadcrumbs can be frozen for up to 3 months.
In most cases, you don’t even need to thaw them first.
Simply sprinkle frozen breadcrumbs directly into your recipe or onto your dish before cooking.
Signs They’ve Gone Stale
Before using stored breadcrumbs, take a quick look and smell to make sure they’re still fresh.
Discard the breadcrumbs if you notice any of the following:
- A sour, musty, or unpleasant smell.
- Visible mold or discoloration.
- Clumps caused by moisture that don’t break apart easily.
- A soft or damp texture instead of dry, crisp crumbs.
When in doubt, it’s always better to make a fresh batch.
Tips for the Best Homemade Breadcrumbs
- Dry the bread completely before blending – Removing all the moisture creates crisp breadcrumbs that store well and won’t clump together.
- Blend in short pulses for even texture – Pulse a few times at a time so you can stop when the breadcrumbs reach the consistency you want.
- Season after blending for better distribution – Mixing seasonings into finished breadcrumbs helps coat every crumb more evenly.
- Let the breadcrumbs cool before storing – Cooling completely prevents condensation from forming inside the container.
- Store in airtight containers – A tightly sealed container keeps out air and moisture, helping the breadcrumbs stay fresh longer.
- Freeze extras for longer storage – Keep extra breadcrumbs in the freezer so you always have a batch ready to use.
- Label containers with the preparation date – Adding the date makes it easy to use the oldest batch first and keep your pantry organized.
Common Mistakes to Avoid
Using Moist Bread
Bread that still contains moisture won’t produce crisp breadcrumbs.
Instead, the crumbs may become soft, uneven, or clump together during storage.
Take the time to dry the bread completely before blending.
The bread should feel firm and crisp all the way through, with no soft spots in the center.
Overprocessing Into Powder
It’s easy to keep the food processor running a little too long.
When that happens, the breadcrumbs become very fine and powdery instead of light and fluffy.
Pulse the bread in short bursts and stop every few seconds to check the texture.
If your recipe calls for coarse breadcrumbs, stop blending while some larger pieces are still visible.
Skipping the Cooling Step
Freshly toasted breadcrumbs may feel dry, but they still hold a little heat.
If you transfer them to a container right away, that trapped heat can create moisture inside.
Let the breadcrumbs cool completely on the baking sheet before storing them.
A few extra minutes of cooling helps keep them crisp for much longer.
Storing While Still Warm
Even slightly warm breadcrumbs can create condensation once the container is sealed.
That extra moisture can soften the crumbs and shorten their storage life.
Always check that the breadcrumbs are completely cool before placing the lid on the container.
It’s a simple habit that makes a big difference.
Adding Too Much Salt
Seasoned breadcrumbs are delicious, but it’s easy to overdo the salt.
Remember that many recipes already include salt, so heavily salted breadcrumbs can make the finished dish taste overly salty.
Start with a small amount and taste the breadcrumb mixture before adding more.
If you’re making breadcrumbs for a variety of recipes, consider storing them plain and seasoning only the amount you need for each dish.
That approach gives you the most flexibility and makes it easier to match the flavor to whatever you’re cooking.
| Problem | Quick Fix |
|---|---|
| Breadcrumbs are soft | Dry longer in the oven |
| Powdery texture | Pulse less next time |
| Clumping | Dry completely before storing |
| Too salty | Mix with plain breadcrumbs |
| Uneven crumbs | Blend in smaller batches |
Homemade vs. Store-Bought Breadcrumbs
Both homemade and store-bought breadcrumbs have their place in the kitchen.
If you’re short on time, a store-bought container is convenient and ready to use.
If you enjoy cooking from scratch, homemade breadcrumbs give you more control over the flavor, texture, and ingredients.
Here’s a quick comparison to help you decide which option works best for you:
| Homemade Breadcrumbs | Store-Bought Breadcrumbs |
|---|---|
| Budget-friendly – A great way to use leftover bread and save money. | Convenient – Ready to use straight from the package. |
| Custom seasoning – Add your favorite herbs and spices to suit any recipe. | Limited flavors – Available in a few varieties, but less flexible than homemade. |
| Fewer additives – You choose exactly what goes into every batch. | May contain preservatives – Some brands include preservatives or anti-caking agents for a longer shelf life. |
| Great for reducing food waste – Turns stale bread into a useful pantry staple. | Longer shelf life – Unopened packages can often be stored for several months. |
| Adjustable texture – Make fine, coarse, or panko-style crumbs whenever you need them. | Consistent texture – Every package has a uniform texture that’s ready for cooking. |
For many home cooks, homemade breadcrumbs offer the best balance of flavor, freshness, and flexibility.
They’re easy to make, simple to customize, and a smart way to use bread that might otherwise go to waste.
Kitchen Confidence Tip
If your breadcrumbs don’t look exactly the way you expected, don’t worry.
Fine breadcrumbs should feel light and dry, while coarse breadcrumbs should have some larger pieces for extra crunch.
If they seem a little soft after blending, simply spread them onto a baking sheet and bake at 300°F (150°C) for another 5 minutes.
Let them cool completely before storing. It’s much easier to dry breadcrumbs a little longer than to fix a batch that has absorbed moisture after being stored.
Final Thoughts
Making homemade vegan breadcrumbs is an easy, budget-friendly way to turn leftover bread into a pantry staple you’ll use again and again.
You get complete control over the flavor, texture, and seasonings while helping reduce food waste at the same time.
Don’t be afraid to try different types of bread, herbs, and spices until you find your favorite combination.
Once you have a fresh batch ready to go, you’ll always have an easy way to add extra crunch and flavor to everything from roasted vegetables to pasta bakes and crispy tofu.
FAQs
Can I make breadcrumbs from fresh bread?
Yes. Fresh bread works well, but it should be dried in the oven or air-dried first so the breadcrumbs turn out crisp instead of soft.
Do I have to toast the bread first?
No. You only need to dry the bread completely. Toasting after blending is optional if you want extra crunchy breadcrumbs.
Can I freeze homemade breadcrumbs?
Yes. Store them in an airtight freezer-safe bag or container for up to 3 months. You can use them straight from the freezer in most recipes.
How long do homemade breadcrumbs last?
They typically last up to 2 weeks in the pantry, up to 1 month in the refrigerator, and up to 3 months in the freezer when stored properly.
Can I use gluten-free bread?
Absolutely. Any gluten-free bread that’s also vegan can be used to make homemade breadcrumbs using the same method.
What’s the difference between breadcrumbs and panko?
Regular breadcrumbs are smaller and finer, while panko-style breadcrumbs are larger, lighter, and create a crispier coating.
Can I season them before storing?
Yes. Dried seasonings like garlic powder, herbs, and paprika store well. If using fresh ingredients like lemon zest, it’s best to make only what you’ll use within a few days or refrigerate the breadcrumbs.
Why are my breadcrumbs clumping together?
Clumping usually means the breadcrumbs still contained moisture or were stored before they had cooled completely. Make sure they’re fully dry and completely cool before sealing them in an airtight container.
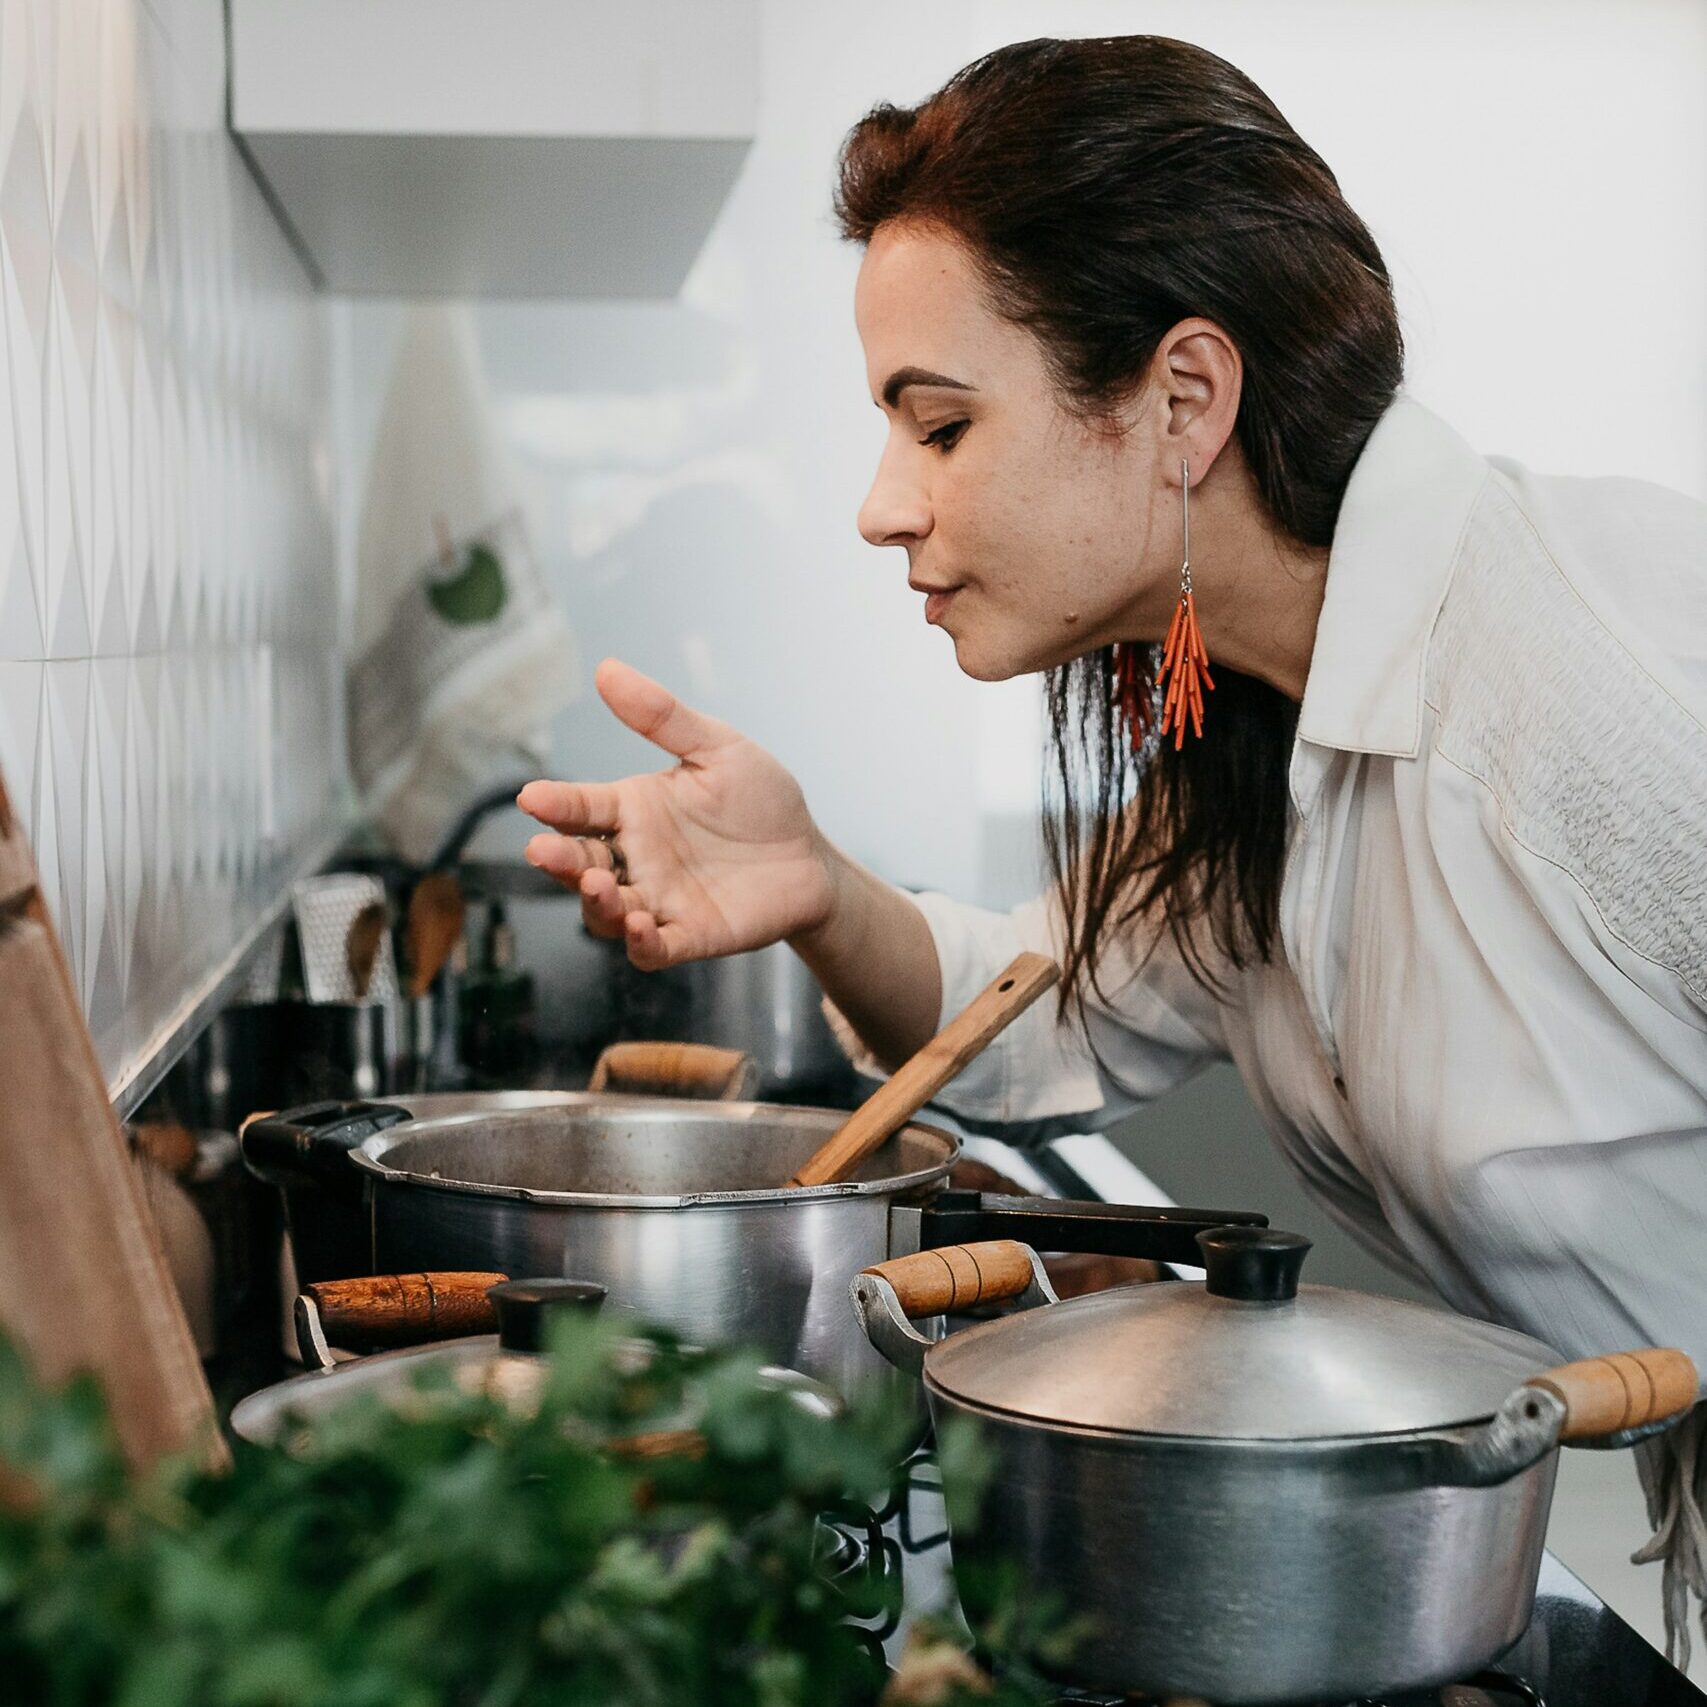
Hi, I’m Daisy Roots, the home cook and recipe developer behind this kitchen. I create simple, tested vegan recipes using everyday ingredients. Every dish is developed and cooked in my own kitchen, with clear steps to help you get reliable results every time. Thanks for stopping by — let’s cook something great!