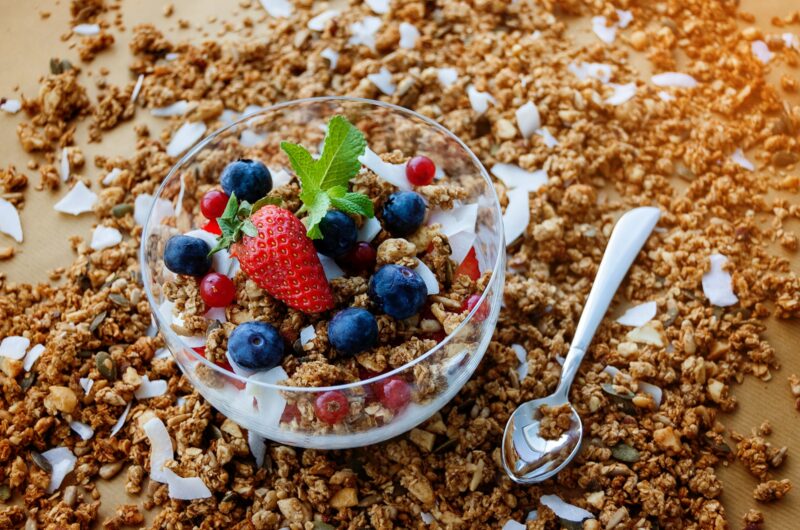
If you’ve never made homemade granola before, you’re in for a treat.
This vegan granola is crisp, crunchy, and filled with the rich flavor of toasted nuts, hearty seeds, and just the right touch of natural sweetness.
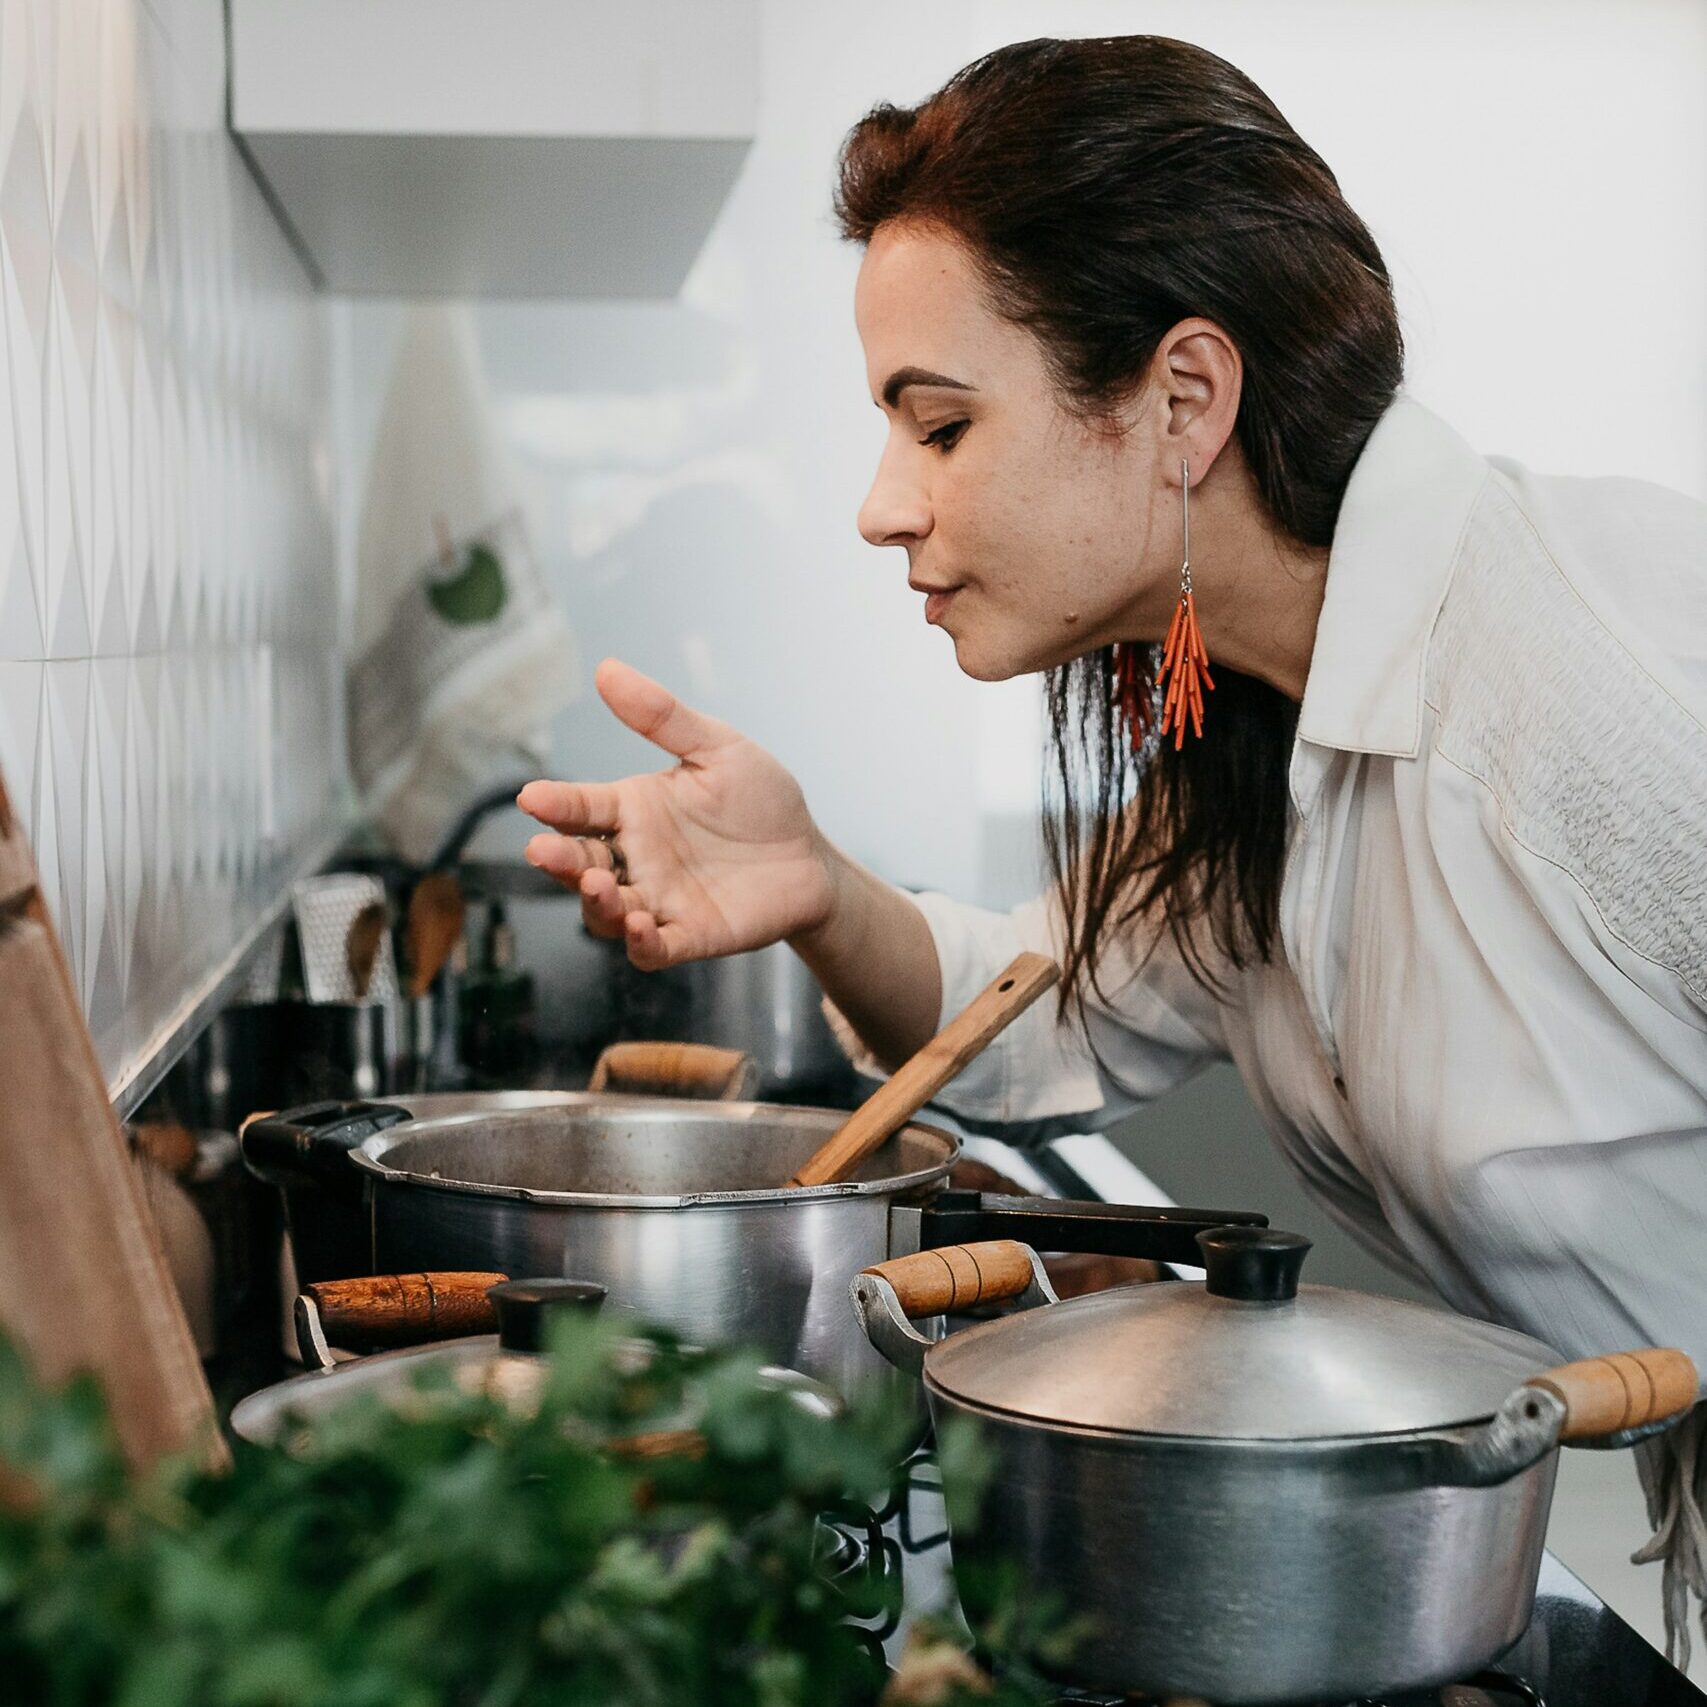
Making your own granola is surprisingly simple and gives you complete control over what goes into every batch.
No unnecessary extras—just wholesome ingredients that bake into golden clusters you’ll want to snack on straight from the jar.
Enjoy it over plant-based yogurt, with your favorite milk, or by the handful whenever you need a quick bite.
It’s easy to make ahead, stores well, and adds delicious crunch to breakfast all week long.
Why You’ll Love This Homemade Vegan Granola
- Completely plant-based and dairy-free – Made with simple vegan ingredients, making it suitable for a variety of diets and lifestyles.
- Naturally sweetened – A touch of maple syrup adds delicious sweetness without relying on refined sugars.
- Rich in fiber, healthy fats, and protein – Nuts, seeds, and oats create a satisfying blend of textures and flavors that helps keep you feeling full.
- Easy to customize with your favorite nuts and seeds – Swap ingredients based on what you have on hand or the flavors you enjoy most.
- Budget-friendly and great for batch cooking – Make a large batch at home for a fraction of the cost of many store-bought granolas.
Ingredients You’ll Need
Dry Ingredients
- 3 cups rolled oats
- ½ cup chopped almonds
- ½ cup chopped pecans
- ½ cup chopped walnuts
- ⅓ cup pumpkin seeds
- ⅓ cup sunflower seeds
- 2 tablespoons chia seeds
- 1 teaspoon ground cinnamon
- ½ teaspoon sea salt
Wet Ingredients
- ⅓ cup pure maple syrup
- ¼ cup melted coconut oil
- 1 teaspoon vanilla extract

Recommended Equipment
You don’t need any special tools to make homemade vegan granola, but these kitchen basics will make the process easier:
- Large mixing bowl – Gives you plenty of room to combine the oats, nuts, seeds, and wet ingredients evenly.
- Rimmed baking sheet – Helps the granola bake evenly while preventing ingredients from spilling over the edges.
- Parchment paper – Keeps the granola from sticking and makes cleanup quick and easy.
- Silicone spatula – Perfect for mixing the ingredients thoroughly and spreading the granola into an even layer.
- Measuring cups and spoons – Ensure consistent results by accurately measuring both dry and wet ingredients.
Ingredient Notes and Substitutions
Best Oats for Granola
Old-fashioned rolled oats are the best choice for homemade granola because they bake up crisp and crunchy while holding their shape well.
For the best texture, avoid instant oats, which can become soft and crumbly during baking.
Nut Options
Feel free to use one type of nut or a combination of your favorites:
- Almonds
- Cashews
- Pecans
- Walnuts
- Hazelnuts
Tip: Roughly chop larger nuts so they mix evenly with the oats and seeds.
Seed Options
Seeds add extra crunch and variety to every bite. Try any combination of:
- Pumpkin seeds
- Sunflower seeds
- Hemp seeds
- Flaxseeds
- Chia seeds
Sweetener Alternatives
Maple syrup works beautifully in this recipe, but you can substitute it with:
- Agave syrup
- Date syrup
- Brown rice syrup
Keep the quantity the same when making these swaps to maintain the right balance of sweetness and texture.
Granola Customization Chart
Use this quick guide to customize your granola based on the flavors and textures you enjoy most.
| If You Like… | Add |
|---|---|
| More Crunch | Extra chopped nuts |
| More Clusters | Press the mixture firmly onto the baking sheet before baking |
| More Sweetness | An extra 1–2 tablespoons of maple syrup |
| Tropical Flavor | Coconut flakes and dried pineapple |
| Chocolate Flavor | Cocoa powder and vegan chocolate chips |
These simple adjustments make it easy to create a batch that suits your taste while keeping the recipe just as easy to make.
How to Make Homemade Vegan Granola
Step 1: Prepare the Oven
Start by preheating your oven to 325°F (165°C).
A fully heated oven helps the granola bake evenly and develop a beautiful golden color without burning.
Line a large baking sheet with parchment paper.
This simple step prevents sticking and makes cleanup much easier once you’re done baking.
Make sure your baking sheet is large enough to spread the granola into a thin, even layer.
Giving the granola plenty of space helps it crisp up instead of steaming in crowded spots.
Step 2: Mix the Dry Ingredients
In a large mixing bowl, combine the rolled oats, chopped almonds, pecans, walnuts, pumpkin seeds, sunflower seeds, chia seeds, ground cinnamon, and sea salt.
Stir everything together until the ingredients are evenly distributed throughout the bowl.
Taking a minute to mix thoroughly ensures every bite has a balance of oats, nuts, seeds, and warm cinnamon flavor.
If any larger nut pieces are clumped together, break them apart with your hands before moving on.
Step 3: Add the Wet Ingredients
In a small bowl or measuring cup, whisk together the maple syrup, melted coconut oil, and vanilla extract.
Mix until the ingredients are fully combined and smooth.
Pour the wet mixture over the dry ingredients.
Use a spatula or large spoon to stir until every oat and seed is lightly coated.
Don’t rush this step.
A well-coated mixture helps the granola bake evenly and creates better flavor throughout the batch.
Step 4: Bake Until Golden
Transfer the granola mixture to the prepared baking sheet.
Spread it into an even layer from edge to edge.
For larger crunchy clusters, gently press the mixture down with the back of a spatula before baking.
Place the baking sheet in the oven and bake for 25 to 30 minutes, or until the granola looks lightly golden and smells toasted.
About halfway through baking, gently stir the granola to encourage even browning.
If you prefer larger clusters, stir only lightly and avoid breaking the mixture apart too much.
Keep an eye on the granola during the final few minutes.
Nuts can go from perfectly toasted to overly browned quite quickly.
Step 5: Cool Completely
Remove the baking sheet from the oven and place it on a cooling rack.
At this stage, the granola may still feel slightly soft in some spots.
That’s completely normal.
Resist the urge to stir or move it around right away.
As the granola cools, the maple syrup and coconut oil firm up and help create those crunchy clusters everyone loves.
Allow it to cool completely on the baking sheet before breaking it into pieces.
This one simple step makes a big difference in the final texture.
Step 6: Add Optional Mix-Ins
Once the granola has cooled completely, stir in any additional ingredients you’d like to use.
Some delicious options include:
- Dried cranberries
- Raisins
- Coconut flakes
- Vegan chocolate chips
Always add these ingredients after baking.
Dried fruit stays chewy, coconut keeps its texture, and chocolate chips won’t melt into the warm granola.
Mix gently until everything is evenly combined.
Your homemade vegan granola is now ready to enjoy, store for later, or package into jars for easy breakfasts and snacks throughout the week.
Tips for Perfect Crunchy Granola
Don’t Overcrowd the Baking Sheet
One of the easiest ways to improve your granola is to give it enough room on the baking sheet.
When the mixture is spread too thickly or packed onto a small pan, the oats and nuts can trap steam as they bake.
Instead of becoming crisp and golden, some areas may stay soft or chewy.
Spread the granola into a thin, even layer whenever possible.
If you’re making a larger batch, it’s better to use two baking sheets than to squeeze everything onto one.
A little extra space helps every piece toast evenly and develop better flavor.
Press the Mixture Down Before Baking for Clusters
If you love chunky granola clusters, don’t skip this simple trick.
After spreading the mixture onto the baking sheet, gently press it down with the back of a spatula or spoon.
This helps the oats, nuts, and seeds stick together as they bake.
Try not to stir too aggressively during baking if large clusters are your goal.
The less you break up the mixture, the more beautiful crunchy pieces you’ll have once it cools.
Those golden clusters are perfect for snacking straight from the jar.
Avoid Overbaking
Granola continues to firm up as it cools, so it doesn’t need to look extremely dark when it comes out of the oven.
Look for a light golden color and a toasted aroma.
If the nuts start becoming too dark, the granola can quickly take on a bitter flavor.
Every oven is a little different, so begin checking a few minutes before the recommended baking time ends.
It’s always easier to bake granola a little longer than to fix a batch that has baked too much.
Let Granola Cool Fully Before Storing
Patience pays off when it comes to homemade granola.
Fresh from the oven, the mixture may still seem slightly soft in places.
As it cools, the maple syrup and coconut oil set, creating the crisp texture that makes granola so satisfying.
Leave the granola on the baking sheet until it reaches room temperature.
Avoid transferring it to containers while it’s still warm.
Trapped heat can create moisture, which may soften all of that hard-earned crunch.
Once completely cool, store the granola in an airtight container to keep it fresh and crisp for as long as possible.
My Best Granola Tip: If you love large crunchy clusters, press the granola firmly into an even layer before baking and stir it only once halfway through. Then let it cool completely on the baking sheet before breaking it apart. The cooling time is what helps those clusters set and stay crunchy.
Common Granola Mistakes to Avoid
Baking at Too High a Temperature
A hotter oven may seem like a shortcut, but it can cause the nuts and oats to brown too quickly before the granola has a chance to crisp up properly.
Stick to a moderate oven temperature for the best texture and flavor.
Storing Before Completely Cooled
Warm granola releases steam, which can get trapped inside the storage container and soften the crunch.
Always let the granola cool completely before storing it.
Overcrowding the Baking Sheet
Packing too much granola onto one baking sheet prevents air from circulating around the ingredients.
Spread the mixture into an even layer so it bakes evenly and becomes nicely crisp.
Stirring Too Often When Making Clusters
Frequent stirring breaks apart the granola as it bakes and prevents larger clusters from forming.
If you love chunky clusters, stir only once halfway through baking and handle the mixture gently.
Flavor Variations
One of the best things about homemade granola is how easy it is to customize.
A few simple changes can create a completely different flavor while keeping the same crunchy texture you already love.
Start with the base recipe and try one of these delicious variations.
Cinnamon Maple Granola
If you enjoy warm, cozy flavors, this variation is a great place to start.
Increase the ground cinnamon to 2 teaspoons for a more pronounced spice flavor.
Add an extra tablespoon or two of maple syrup to bring out the natural sweetness and create deeper caramelized notes during baking.
The combination of toasted oats, crunchy nuts, cinnamon, and maple creates a comforting flavor that’s especially delicious on cool mornings.
Serve it with plant-based milk or sprinkle it over yogurt for a simple breakfast that feels a little extra special.
Chocolate Nut Granola
For a richer twist, turn your granola into a chocolate lover’s dream.
Add 2 tablespoons of unsweetened cocoa powder to the dry ingredients before mixing.
The cocoa coats the oats and nuts with a deep chocolate flavor as they bake.
Once the granola has completely cooled, stir in ½ cup vegan chocolate chips.
Adding the chocolate after baking prevents it from melting into the granola.
This variation tastes wonderful with almonds, walnuts, or pecans and makes an excellent afternoon snack.
Tropical Granola
Bring a little tropical flavor to your breakfast bowl with this bright and fruity variation.
After the granola has cooled, stir in ½ cup unsweetened coconut flakes and ½ cup chopped dried pineapple.
The coconut adds extra crunch while the pineapple brings bursts of sweet, chewy flavor.
This version pairs beautifully with fresh mango, banana slices, or coconut yogurt.
Every bite feels fresh, colorful, and full of texture.
Berry Almond Granola
This variation combines sweet berries with the nutty flavor of toasted almonds.
Use sliced almonds in place of some or all of the other nuts in the recipe.
After cooling, mix in ½ cup freeze-dried berries such as strawberries, raspberries, or blueberries.
Freeze-dried fruit adds concentrated berry flavor without making the granola soft.
The combination creates a balance of crunchy, sweet, and slightly tart flavors that works well for breakfast or snacking.
Peanut Butter Granola
Peanut butter adds rich flavor and helps create extra satisfying clusters.
Whisk ¼ cup natural peanut butter into the maple syrup, coconut oil, and vanilla mixture before combining it with the dry ingredients.
Make sure the peanut butter is smooth and well mixed so it coats the oats evenly.
As the granola bakes, the peanut butter develops a deep roasted flavor that pairs perfectly with the toasted nuts and seeds.
For an even more indulgent version, add a handful of vegan chocolate chips after the granola has cooled completely.
Don’t be afraid to experiment with your own combinations as well.
Once you master the basic recipe, creating new flavors becomes one of the most enjoyable parts of making homemade granola.
Serving Suggestions
Breakfast Ideas
- With plant-based milk – Pour your favorite dairy-free milk over a bowl of granola for a simple and satisfying breakfast.
- Over smoothie bowls – Sprinkle granola on top for a delicious crunchy contrast to creamy smoothies.
- On vegan yogurt – Add a handful to vegan yogurt for extra texture and flavor in every spoonful.
Snack Ideas
- By the handful – Enjoy it straight from the jar whenever you need a quick and crunchy snack.
- Homemade trail mix – Mix granola with dried fruit and extra nuts for an easy grab-and-go snack.
Dessert Toppings
- Fruit crisps – Sprinkle granola over baked fruit desserts for added crunch and nutty flavor.
- Vegan ice cream – Use it as a topping to add texture and a satisfying toasted flavor.
- Chia pudding – Spoon granola over chia pudding for a delicious combination of creamy and crunchy textures.
Best Ways to Use Homemade Granola Throughout the Week
If you’re making a batch for meal prep, this simple guide can help you enjoy your granola in different ways throughout the week.
| Day | Serving Idea |
|---|---|
| Monday | Vegan yogurt parfait |
| Tuesday | Smoothie bowl topping |
| Wednesday | Homemade trail mix |
| Thursday | Chia pudding topping |
| Friday | Breakfast cereal with plant-based milk |
| Saturday | Fruit crisp topping |
| Sunday | Snack by the handful |
Rotating how you serve your granola keeps breakfast and snack time interesting while helping you make the most of every batch.
Storage Instructions
Proper storage helps keep your homemade granola fresh, crunchy, and ready to enjoy whenever you need it.
The good news is that granola stores very well, making it a great recipe to prepare ahead of time.
Before storing, always make sure the granola has cooled completely.
Even a small amount of trapped heat can create moisture inside the container and soften the crunchy texture.
Room Temperature
For everyday use, store the granola in an airtight container at room temperature.
Glass jars, sealed food storage containers, and resealable bags all work well.
Keep the container in a cool, dry place away from direct sunlight and heat sources.
When stored properly, the granola will stay fresh for up to 3 weeks.
If you notice the granola losing a little of its crunch over time, you can spread it on a baking sheet and warm it in the oven for a few minutes to refresh the texture.
Allow it to cool again before returning it to the storage container.
Freezer Storage
If you’d like to keep granola for longer, the freezer is an excellent option.
Place the completely cooled granola in a freezer-safe container or freezer bag.
Removing as much air as possible helps preserve freshness and flavor.
Frozen granola can be stored for up to 3 months.
This is especially helpful if you enjoy making large batches for future breakfasts and snacks.
How to Thaw Before Serving
When you’re ready to enjoy frozen granola, simply remove the amount you need from the freezer.
Let it sit at room temperature for about 10 to 15 minutes.
Because granola contains very little moisture, it thaws quickly and maintains its crunchy texture.
There’s no need to heat it unless you prefer it slightly warm.
Once thawed, enjoy it just as you would a freshly made batch.
Having homemade granola stored and ready to go makes busy mornings a little easier and ensures a crunchy, flavorful topping is always within reach.
Meal Prep Tips
Homemade granola is perfect for meal prep because it stays fresh for weeks and can be used in many different ways.
Make a Double Batch
If you know you’ll be reaching for granola throughout the week, consider doubling the recipe.
The extra batch can be stored in an airtight container or frozen for later, saving you time on future meal prep days.
Store in Portion-Sized Containers
Divide the granola into individual portions after it has cooled completely.
This makes it easy to grab a serving for breakfast, pack a snack, or add a crunchy topping to yogurt and smoothie bowls.
Prepare Smoothie Bowl Toppings in Advance
Create ready-to-use topping containers by combining granola with dried fruit, coconut flakes, or extra seeds.
Having toppings prepared ahead of time makes it quick and easy to assemble a flavorful smoothie bowl on busy mornings.
Final Thoughts
Homemade vegan granola is one of those simple recipes that delivers big flavor with very little effort.
It’s perfect for make-ahead breakfasts, quick snacks, and adding a satisfying crunch to your favorite bowls and desserts.
Once you’ve made a batch, don’t be afraid to experiment with different nuts, seeds, spices, and mix-ins to create your own favorite combination.
Have fun with it, trust your taste buds, and enjoy every crunchy bite.
FAQs
Is homemade granola healthy?
Homemade granola can be a wholesome option because you control the ingredients and can adjust the sweetness, nuts, and seeds to suit your preferences.
Can I make this granola nut-free?
Yes. Simply replace the nuts with additional seeds such as pumpkin seeds, sunflower seeds, or hemp seeds.
Why isn’t my granola crunchy?
Granola may not become crunchy if it is underbaked, overcrowded on the baking sheet, or stored before it has cooled completely.
Can I reduce the sweetness?
Absolutely. You can reduce the maple syrup slightly, but keep enough to help the granola bind together and develop crunchy clusters.
How long does homemade granola last?
When stored in an airtight container at room temperature, homemade granola stays fresh for up to 3 weeks.
The Ultimate Vegan Granola Recipe with Nuts, Seeds, and Oats
Course: Vegan Breakfast RecipesDifficulty: Easy10
servings10
minutes30
minutes40
minutesThis homemade vegan granola is crunchy, lightly sweetened with maple syrup, and packed with oats, nuts, and seeds. It’s perfect for breakfast, snacking, or topping your favorite smoothie bowls and yogurt.
Ingredients
3 cups rolled oats
½ cup chopped almonds
½ cup chopped pecans
½ cup chopped walnuts
⅓ cup pumpkin seeds
⅓ cup sunflower seeds
2 tablespoons chia seeds
1 teaspoon ground cinnamon
½ teaspoon sea salt
⅓ cup pure maple syrup
¼ cup melted coconut oil
1 teaspoon vanilla extract
Directions
- Preheat the oven to 325°F (165°C) and line a baking sheet with parchment paper.
- In a large bowl, combine the oats, almonds, pecans, walnuts, pumpkin seeds, sunflower seeds, chia seeds, cinnamon, and salt.
- In a small bowl, whisk together the maple syrup, coconut oil, and vanilla extract.
- Pour the wet mixture over the dry ingredients and stir until evenly coated.
- Spread the mixture evenly onto the prepared baking sheet.
- Bake for 25–30 minutes, stirring once halfway through, until golden brown.
- Let the granola cool completely before breaking it into clusters and serving.
Notes
- For larger clusters, press the granola firmly onto the baking sheet before baking.
- Store in an airtight container at room temperature for up to 3 weeks.
- Add dried fruit or vegan chocolate chips after the granola has cooled completely.
Hi, I’m Daisy Roots, the home cook and recipe developer behind this kitchen. I create simple, tested vegan recipes using everyday ingredients. Every dish is developed and cooked in my own kitchen, with clear steps to help you get reliable results every time. Thanks for stopping by — let’s cook something great!